

بسم الله الرحمن الرحيم
السلام عليكم ورحمة الله وبركاته
Commercial Hydro Set-Up
تجاري هيدرو مجموعة التركيب خطوة خطوة
للمتعلمين البصرية في العالم. كنت أحب الذهاب إلى هذا!
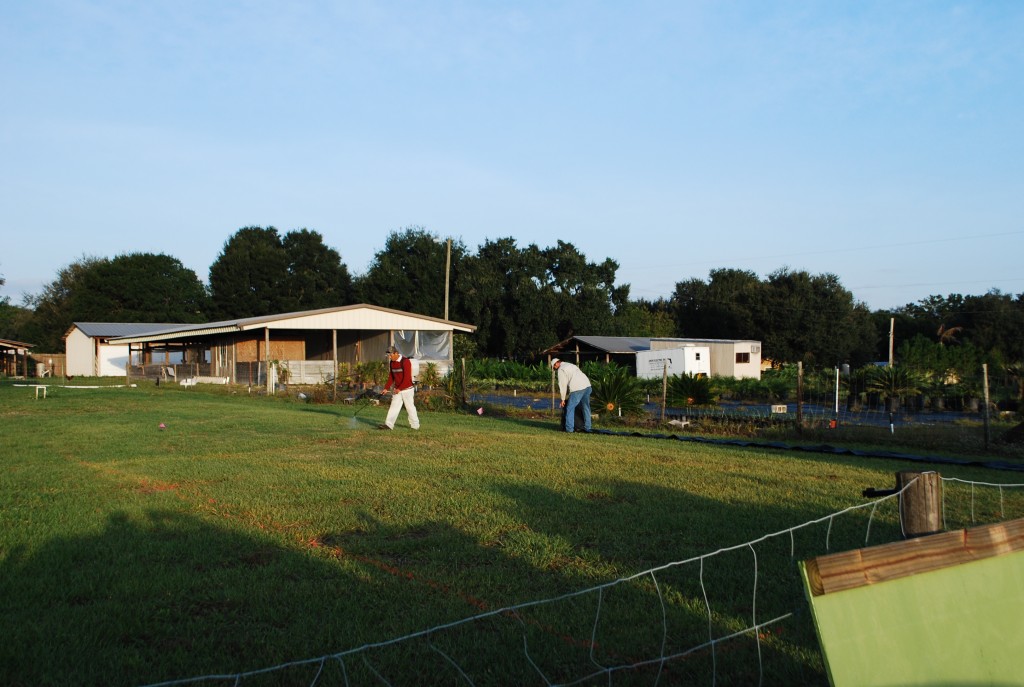
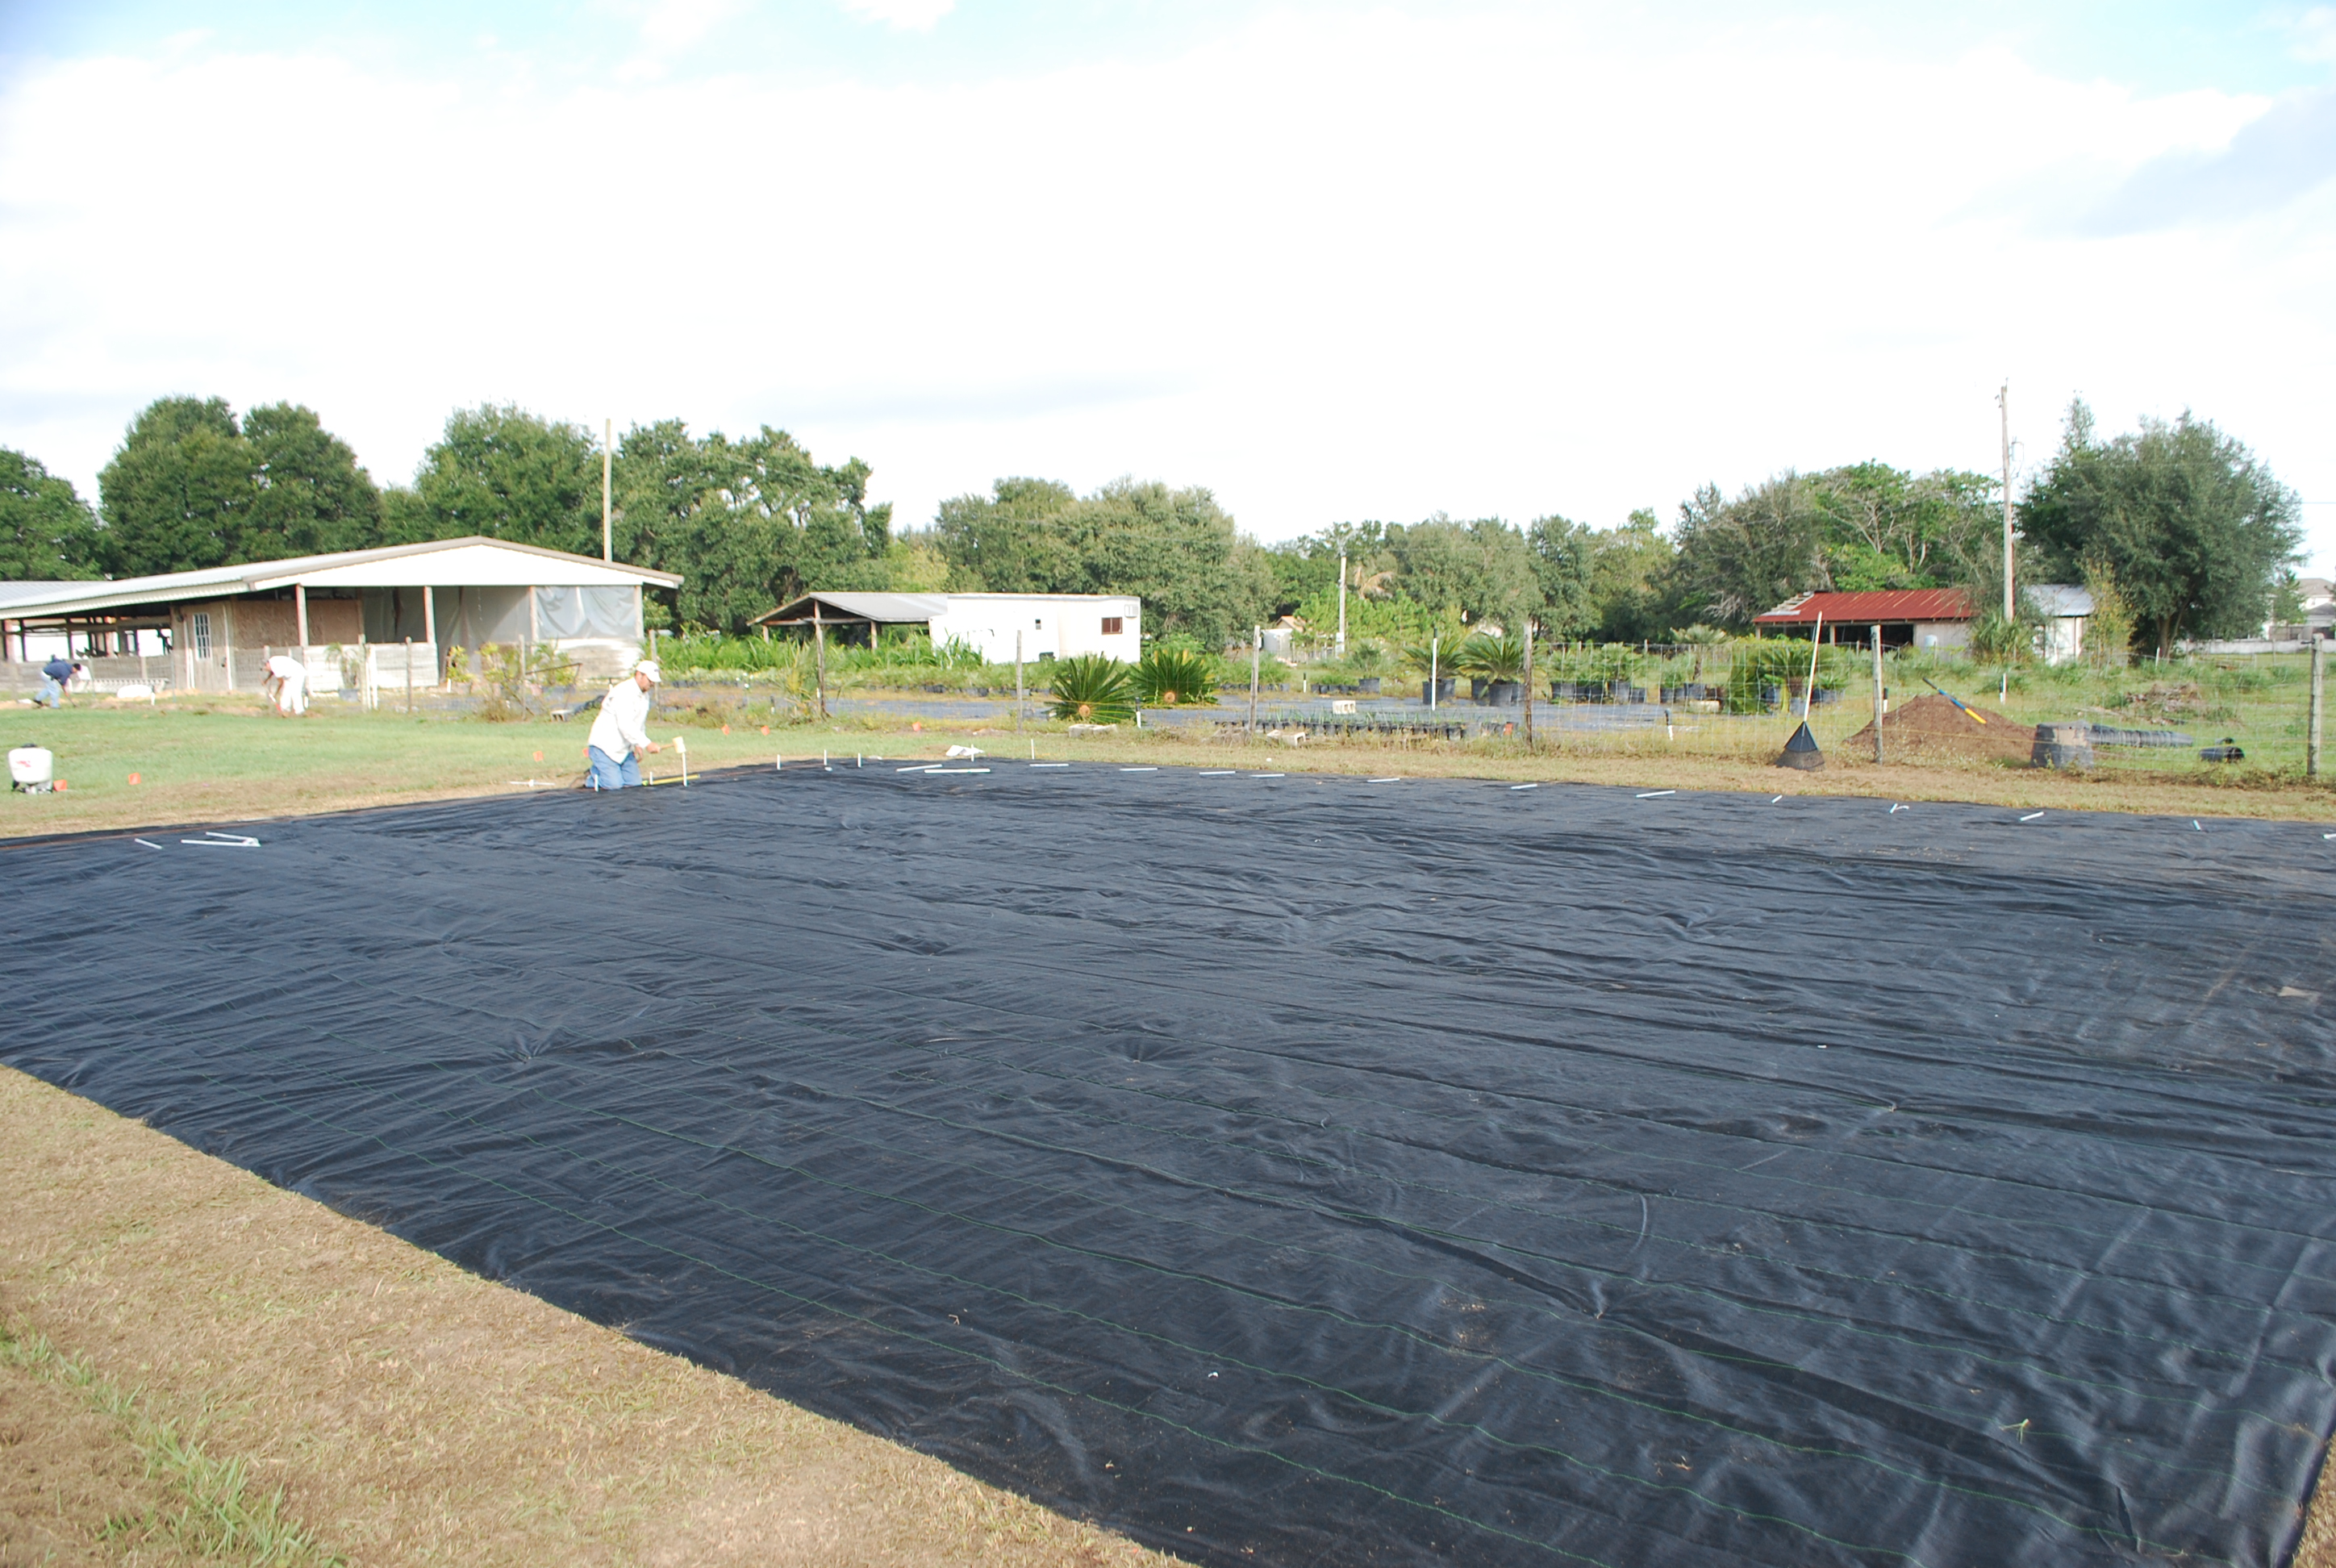
We marked out the area with contractors marking paint. The area was approximately 45ft by 50ft. After marking our area for the farm to be installed, we scalp mowed with a commercial walk behind lawn mower. After scalp mowing we sprayed a weed/grass killer onto the area to help prevent weeds from coming through the ground cover.
نحن تميز بها المنطقة مع المقاولين بمناسبة الطلاء. وقد 45FT المنطقة حوالي 50ft من قبل. بعد وضع العلامات منطقتنا للمزرعة ليتم تثبيتها، فإننا فروة الرأس قص مع المشي وراء جزازة العشب التجارية. بعد فروة الرأس القص نحن رش قاتل الأعشاب الضارة / العشب على المنطقة للمساعدة في منع الحشائش من القدوم من خلال الغطاء الأرضي.

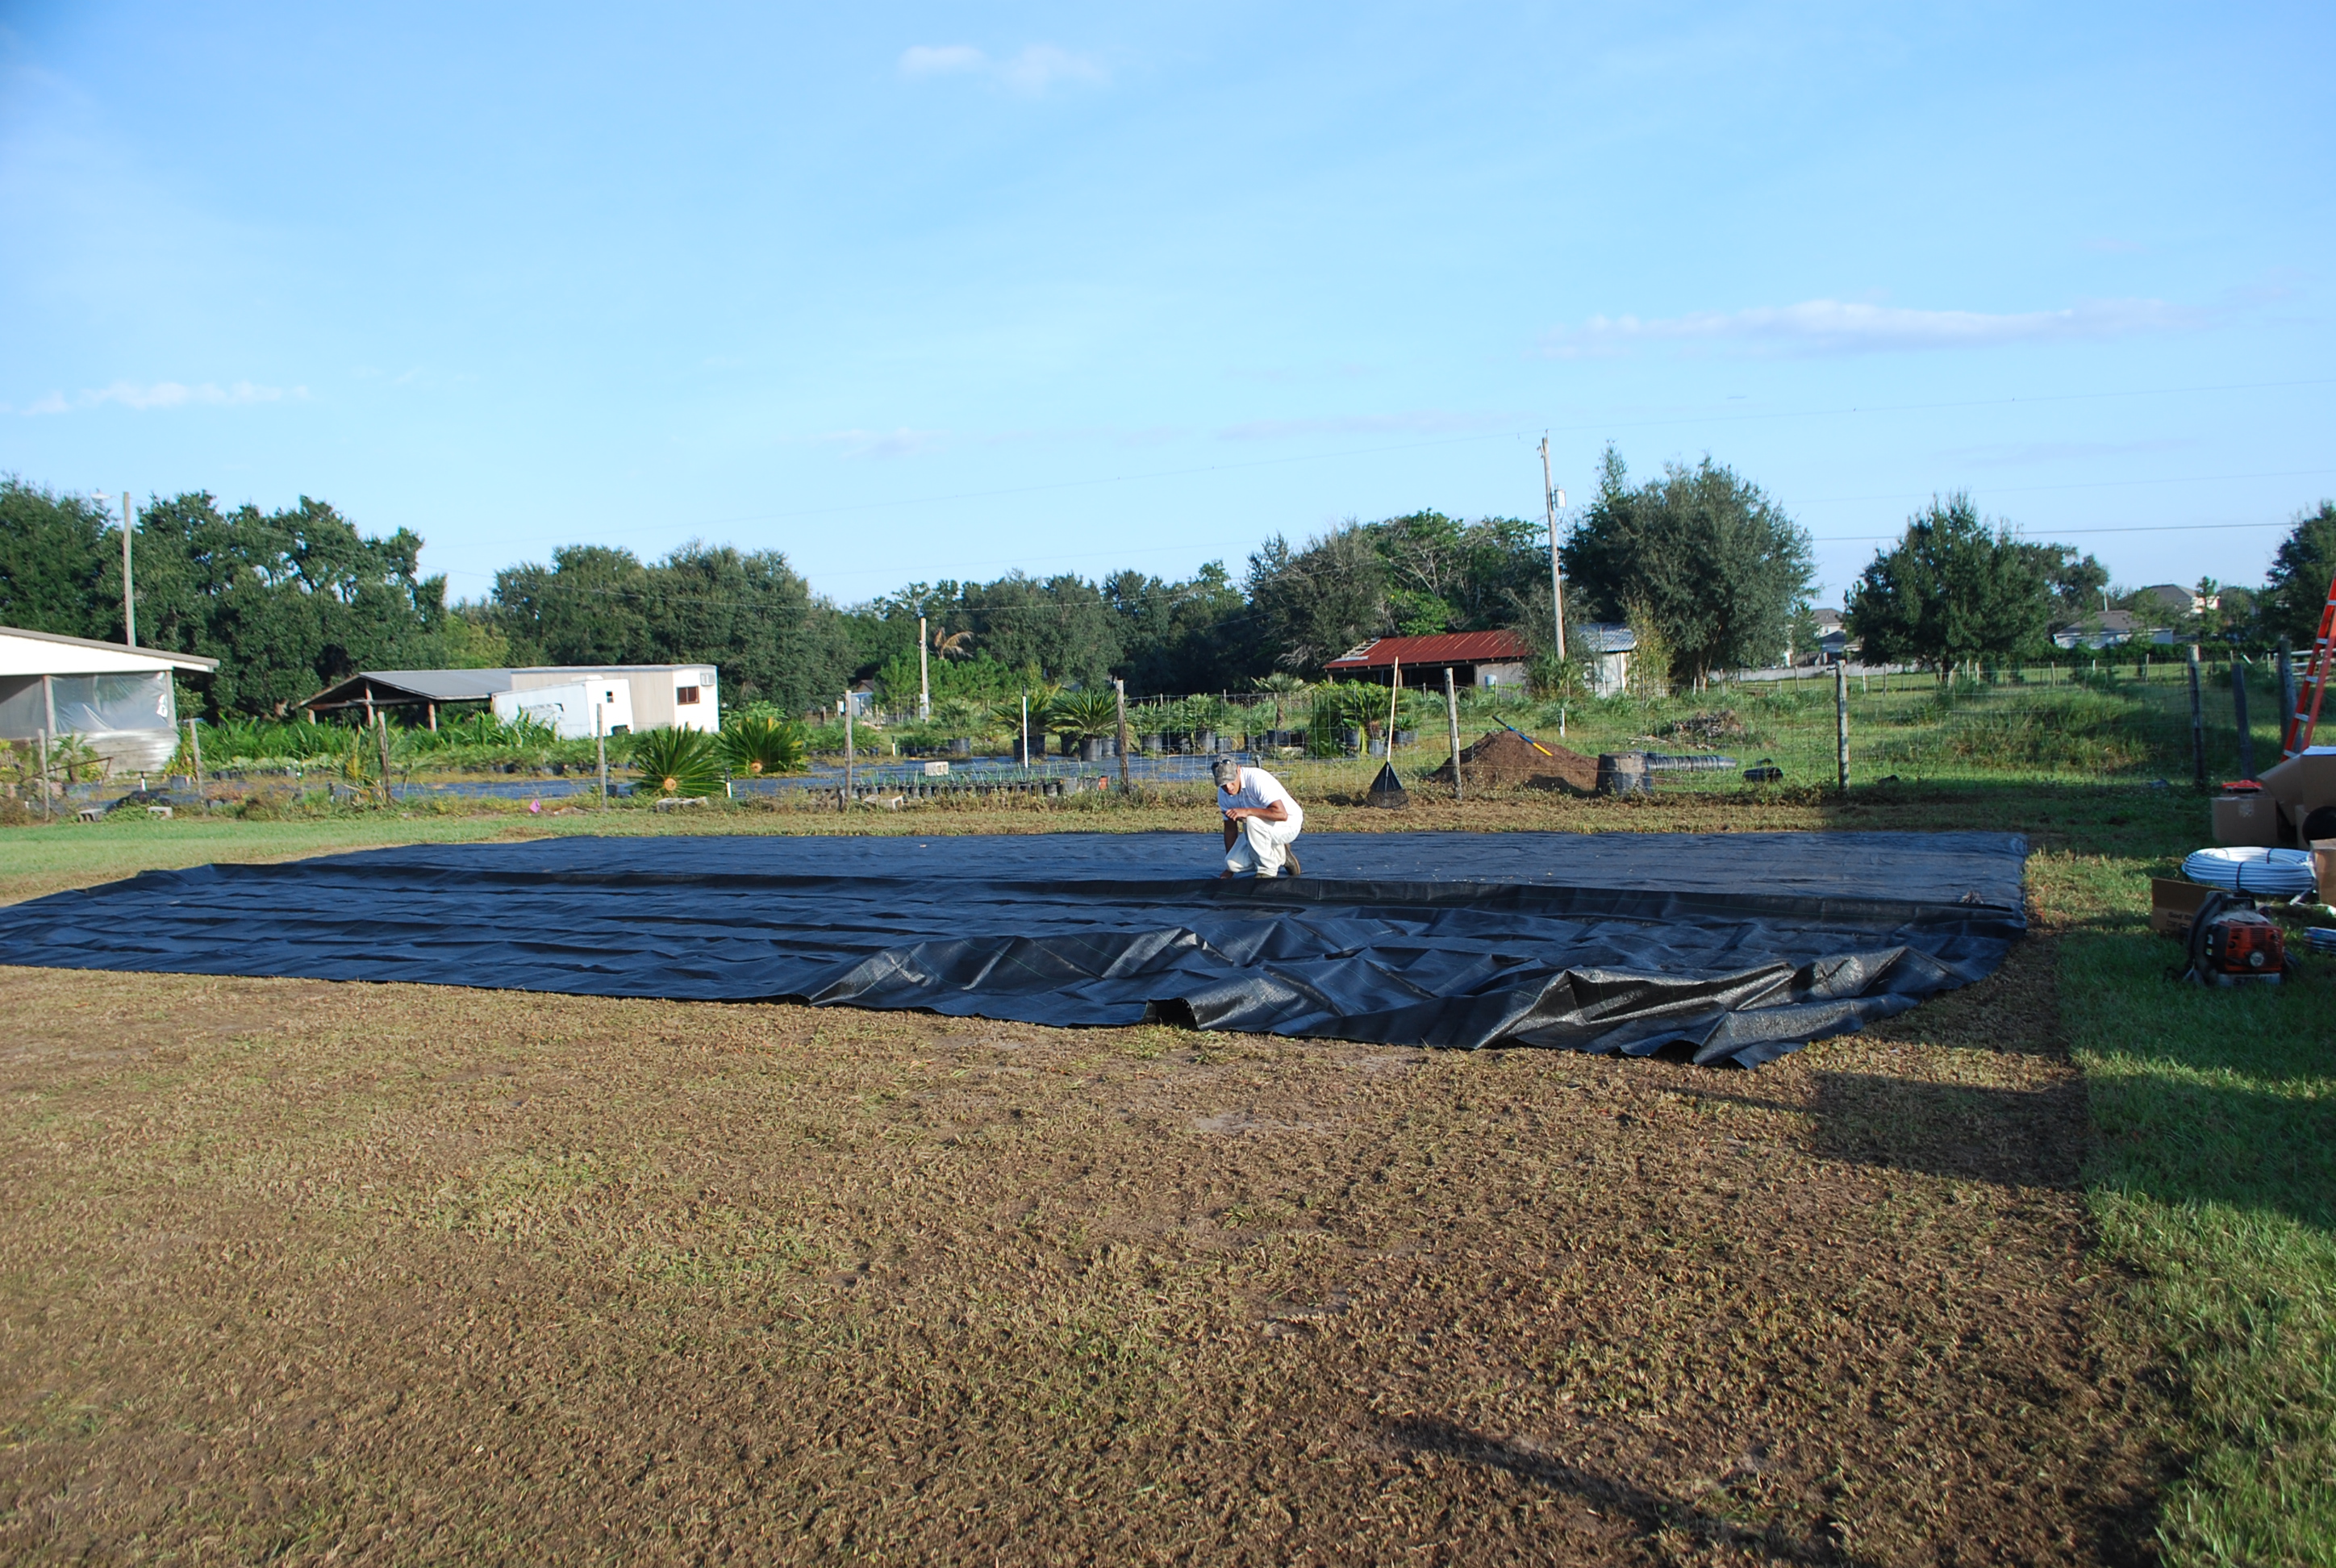
Rolling the ground cover out.
المتداول خارج تغطية الأرض.
 Inserting staples to hold down the ground cover. The staples are spaced 1 foot apart and the cloth is doubled up along the edges.
إدخال المواد الغذائية إلى الاستمرار على غلاف الأرض. متباعدة المواد الغذائية 1 القدم بعيدا وتضاعف القماش على طول الحواف.
 Installing the second ground cover. With the second cover you overlap the first by one foot.
تثبيت الغطاء الأرضي الثاني. مع غطاء الثاني الذي تتداخل أول من قدم واحدة.
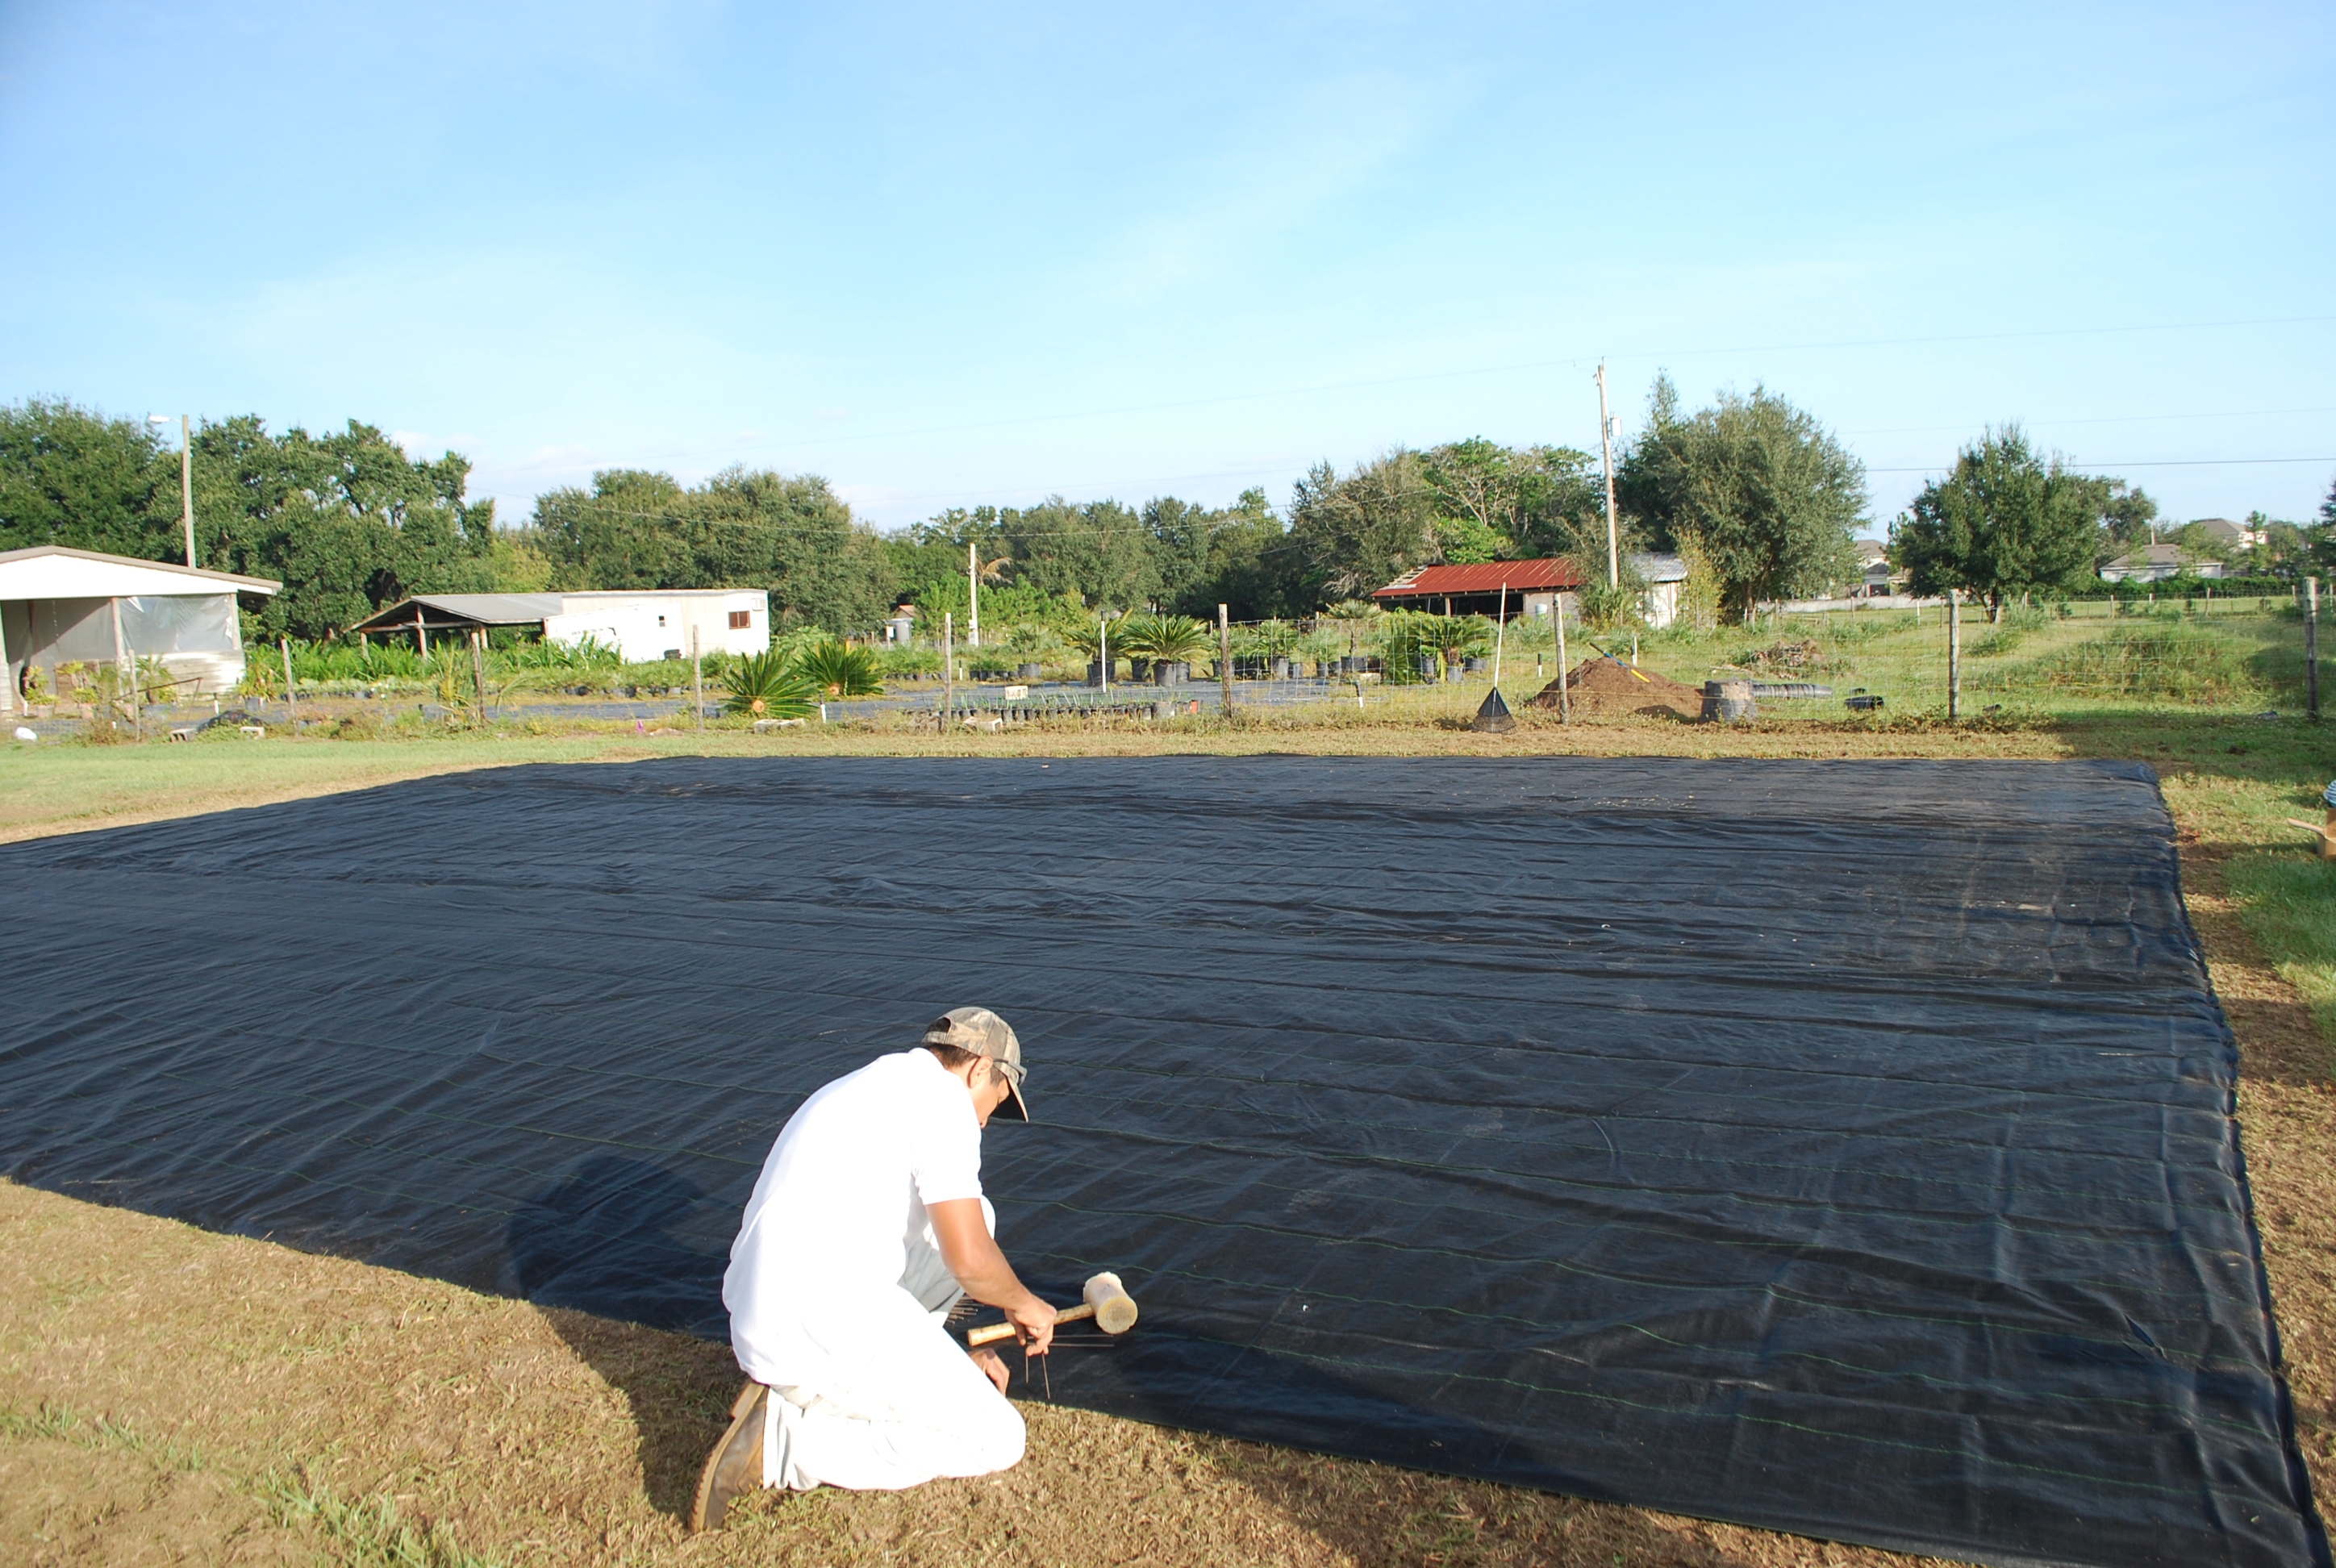 Finishing up the final and third ground cover. A rubber mallet like the one shown in the picture is used for pounding in the staples.
حتى الانتهاء من غلاف الأرض النهائي والثالث. يتم استخدام مطرقة مطاطية مثل واحد هو مبين في الصورة للقصف في المواد الغذائية.
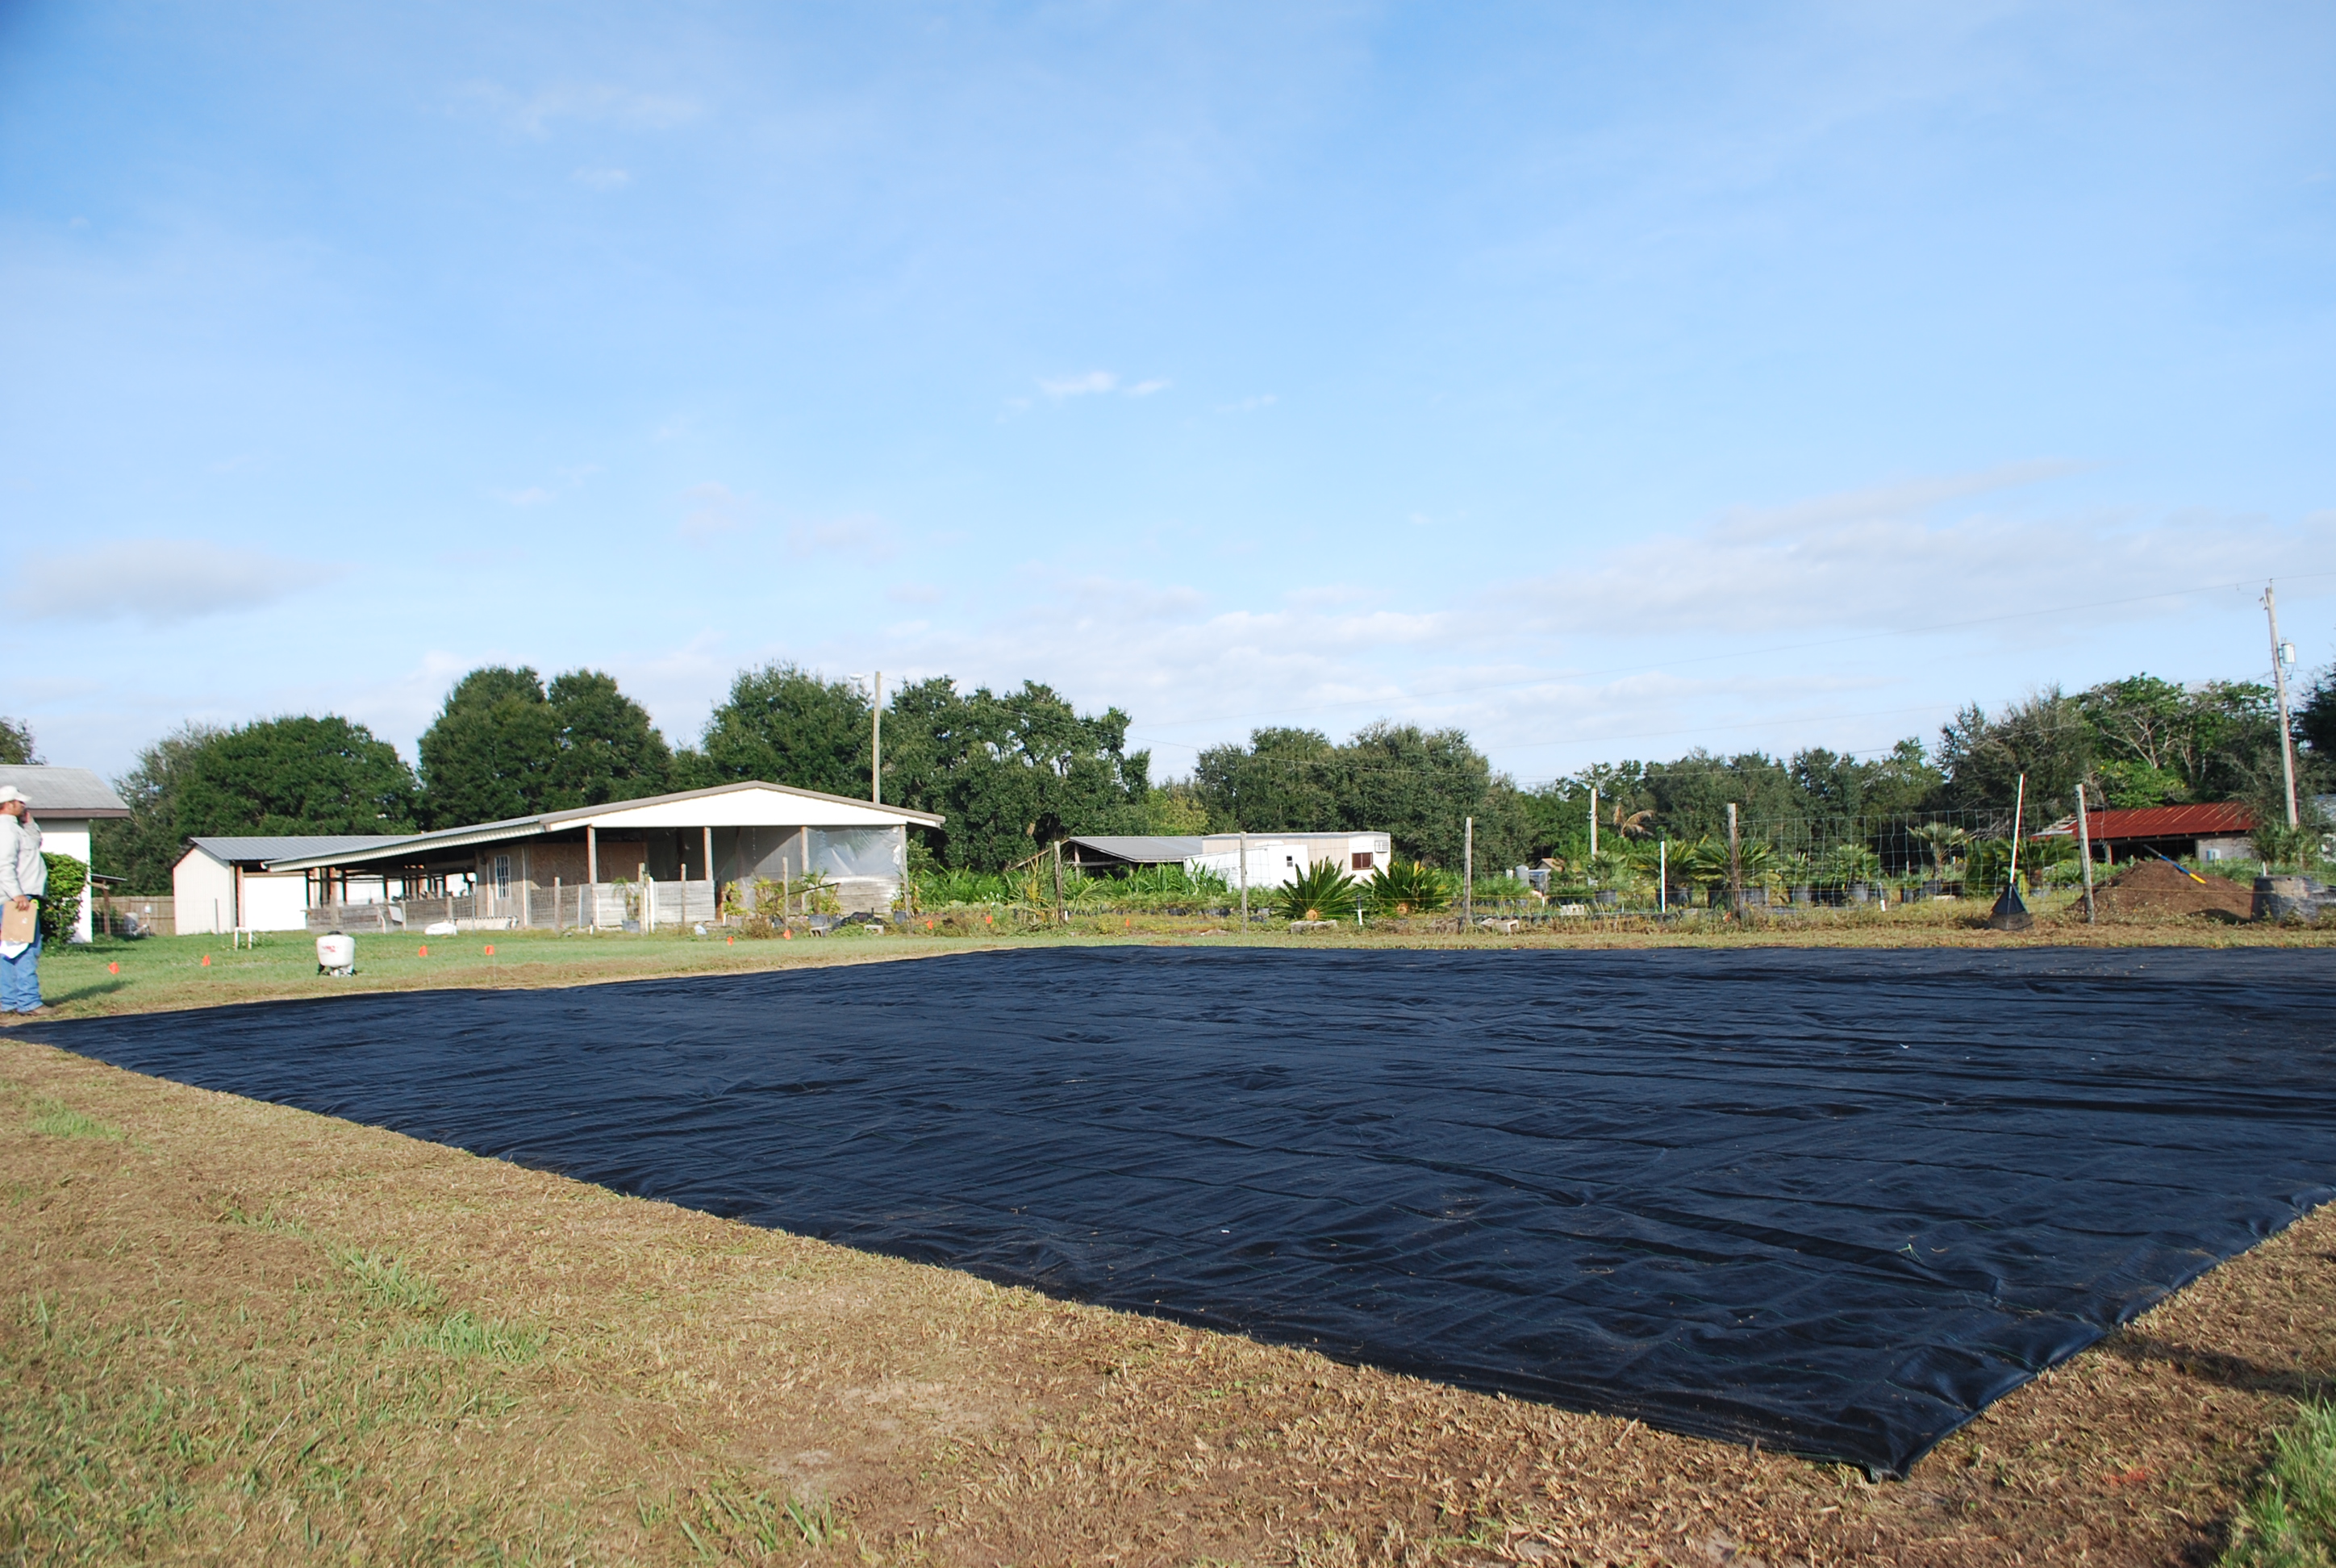
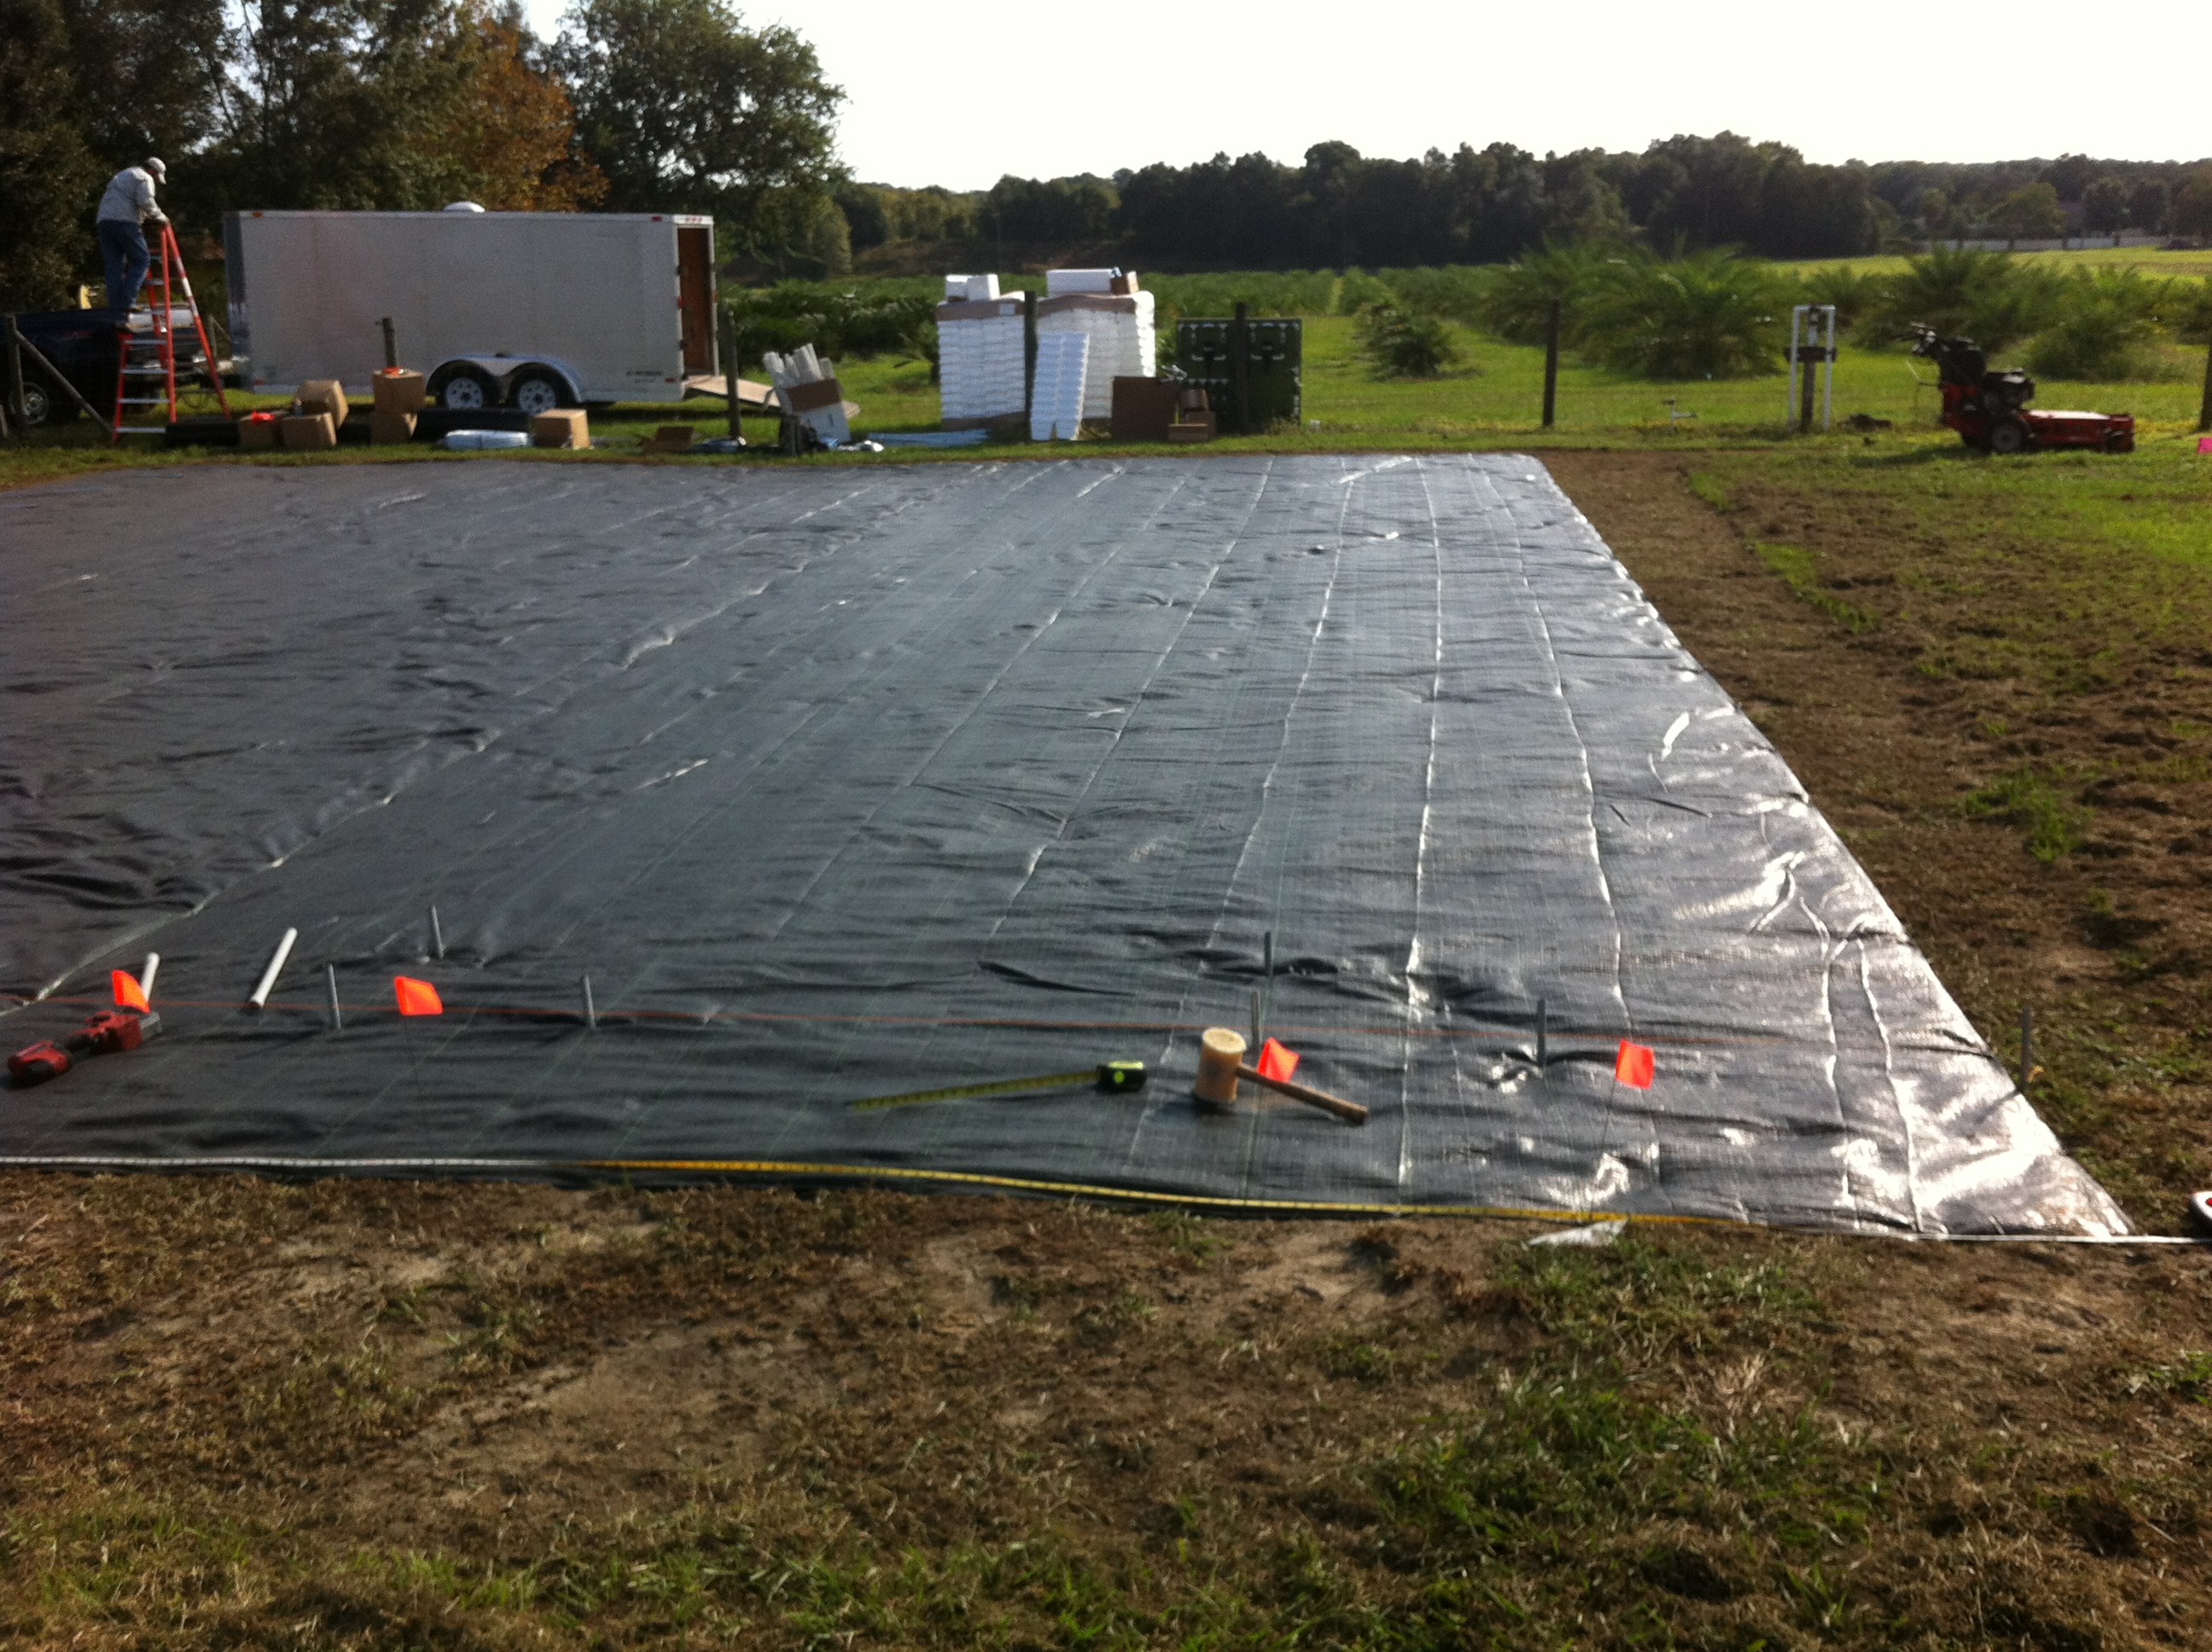
Notice the orange flags along the end of the ground cover? These flags are going to be our rows of hydroponic towers. Each flag set is two hydroponic rows of towers these are spaced 2 feet apart. Each zone is two flag sets (containing four rows of towers). Between each flag set is seven feet. This is easy to measure out and set up because on the ground cover cloth are lines that are one foot apart.
لاحظ الأعلام البرتقالية على طول نهاية غطاء الأرض؟ هذه العلامات سوف تكون الصفوف لدينا من الأبراج المائية. كل مجموعة العلم هو صفين الزراعة المائية من أبراج متباعدة هذه 2 باستثناء القدمين. كل منطقة هي مجموعتين العلم (التي تحتوي على أربعة صفوف من أبراج). بين كل مجموعة العلم هو سبعة أقدام. هذا هو السهل قياس الخروج وانشاء لأن على القماش تغطي الأرض هي الخطوط التي قدم واحدة على حدة.
Pounding in the internal tower support pipe. These are driven into the ground approximately 1 foot.
قصف في أنبوب دعم البرج الداخلي. هي التي تحرك هؤلاء في الأرض حوالي 1 قدم.
This is what each set of rows will look like after you set up your initial tower support pipes.
هذا هو ما كل مجموعة من الصفوف سيبدو بعد إعداد أنابيب دعم البرج الخاص بك الأولية.

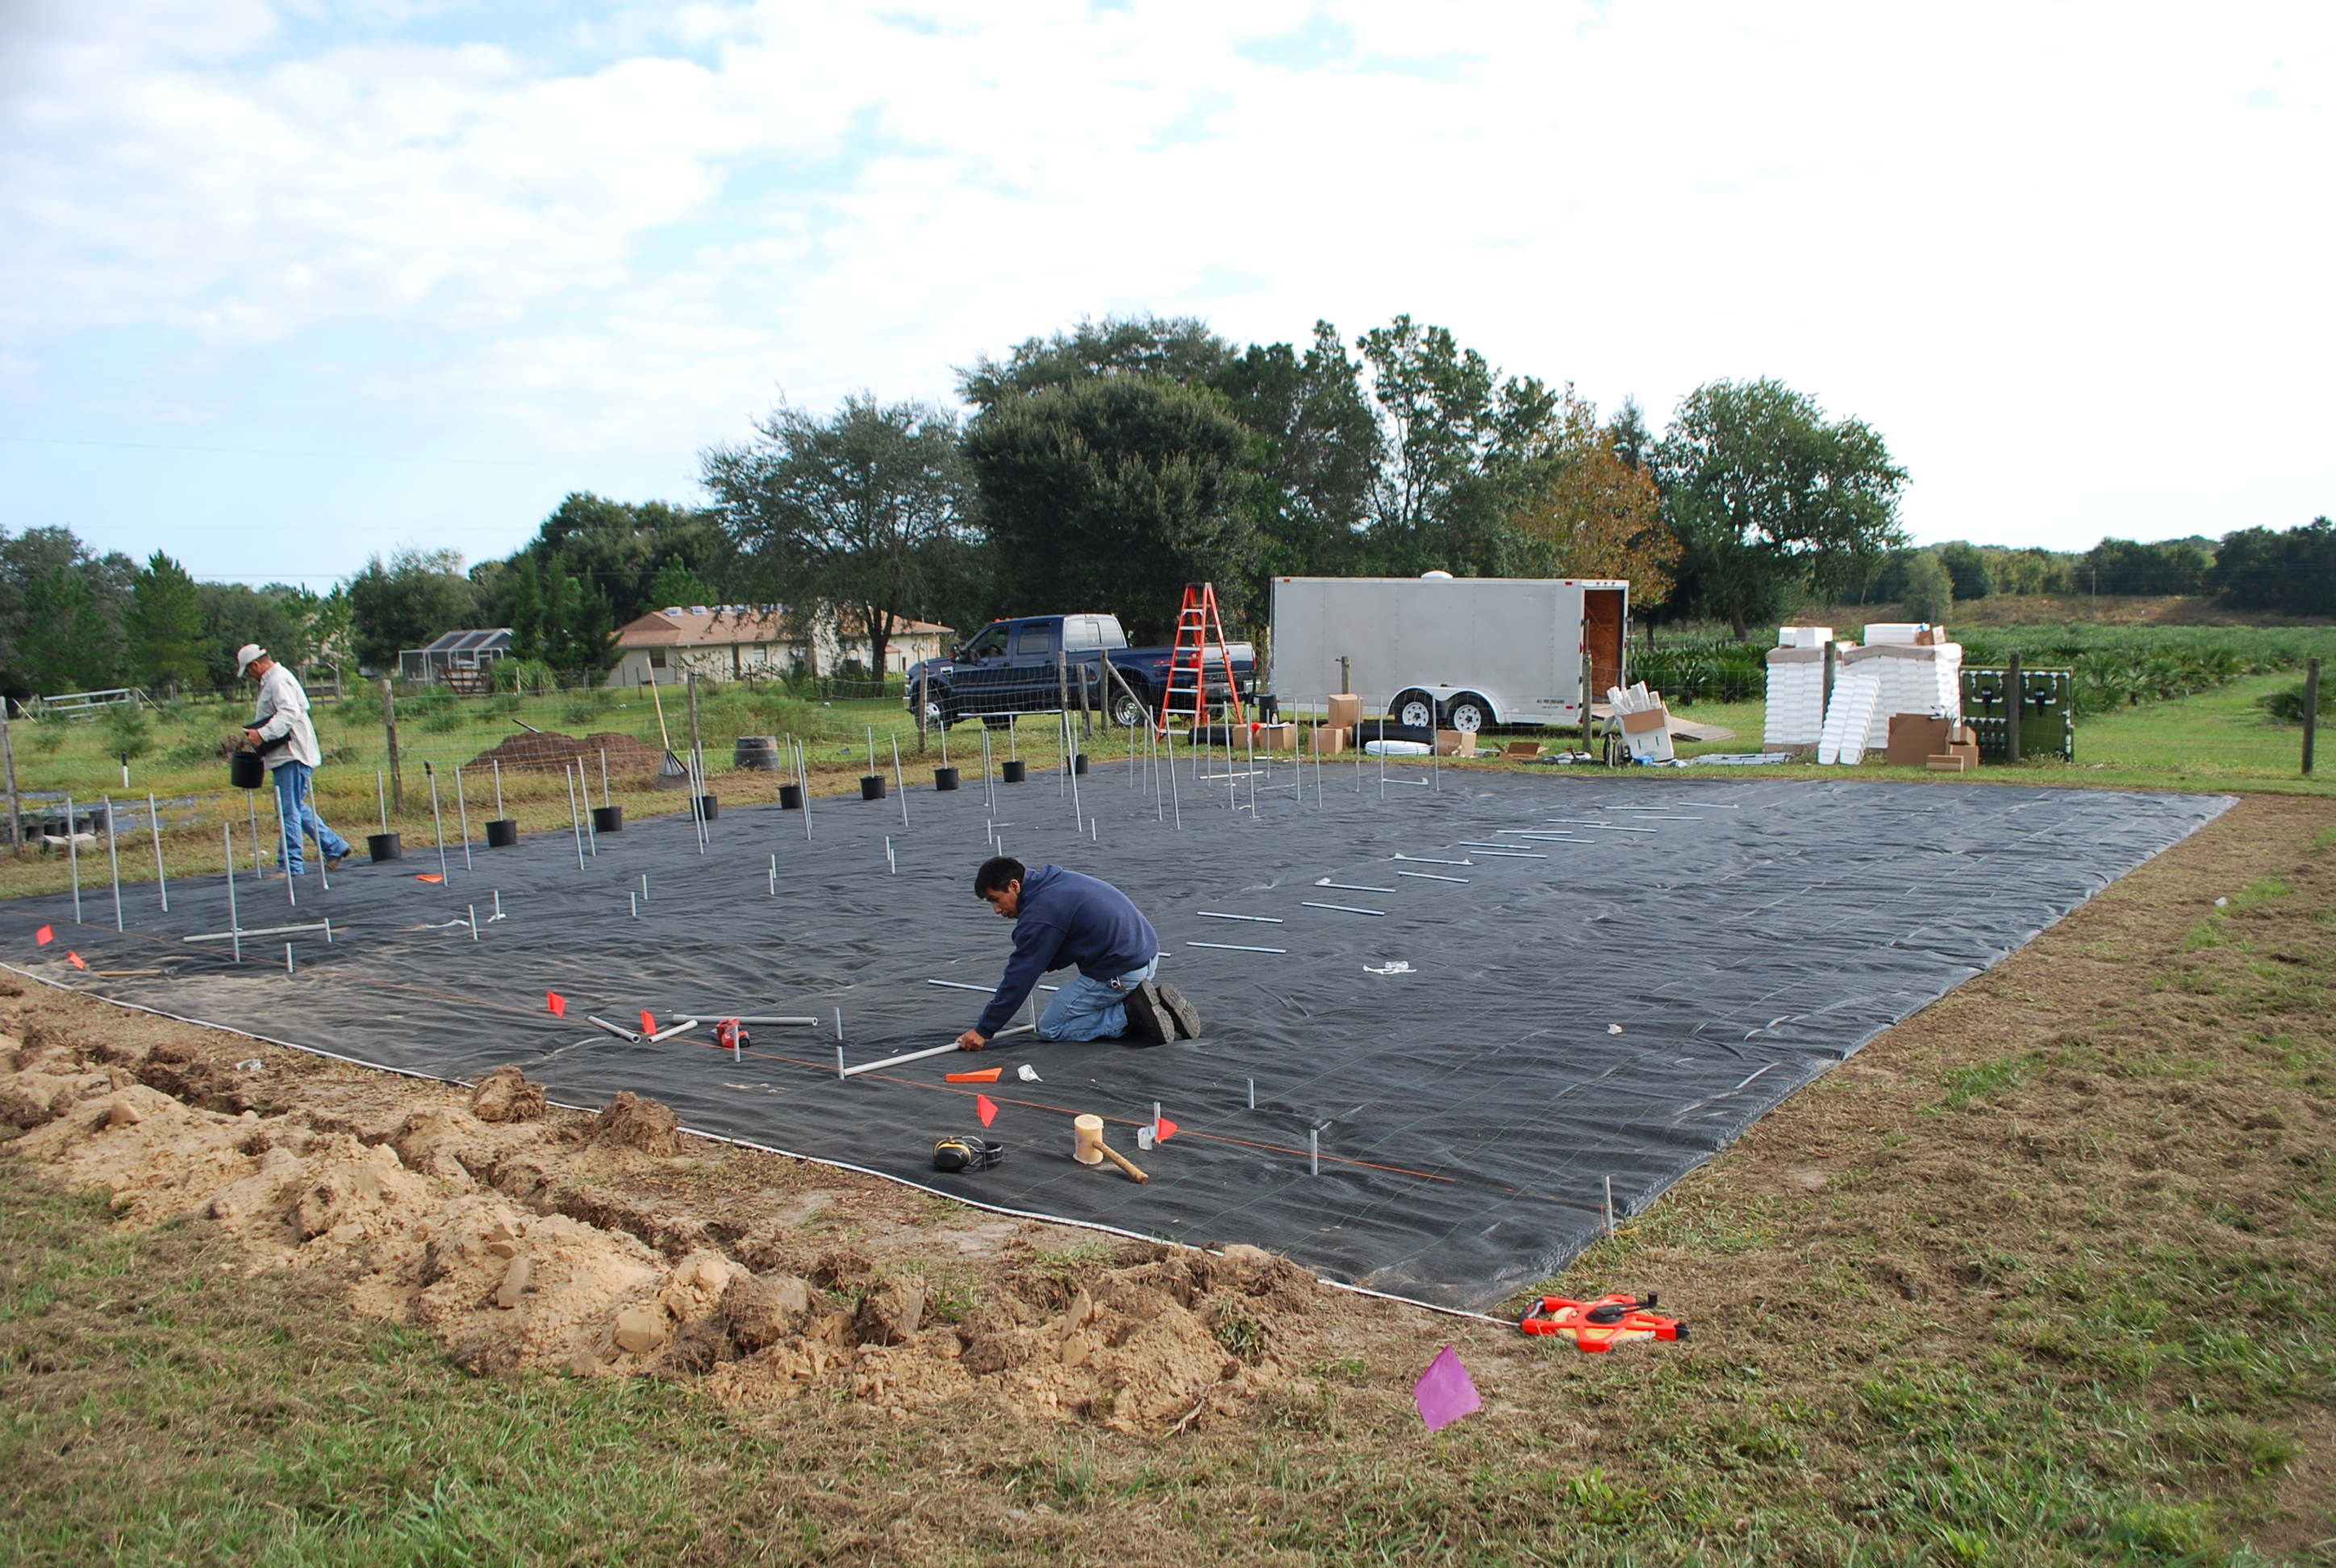
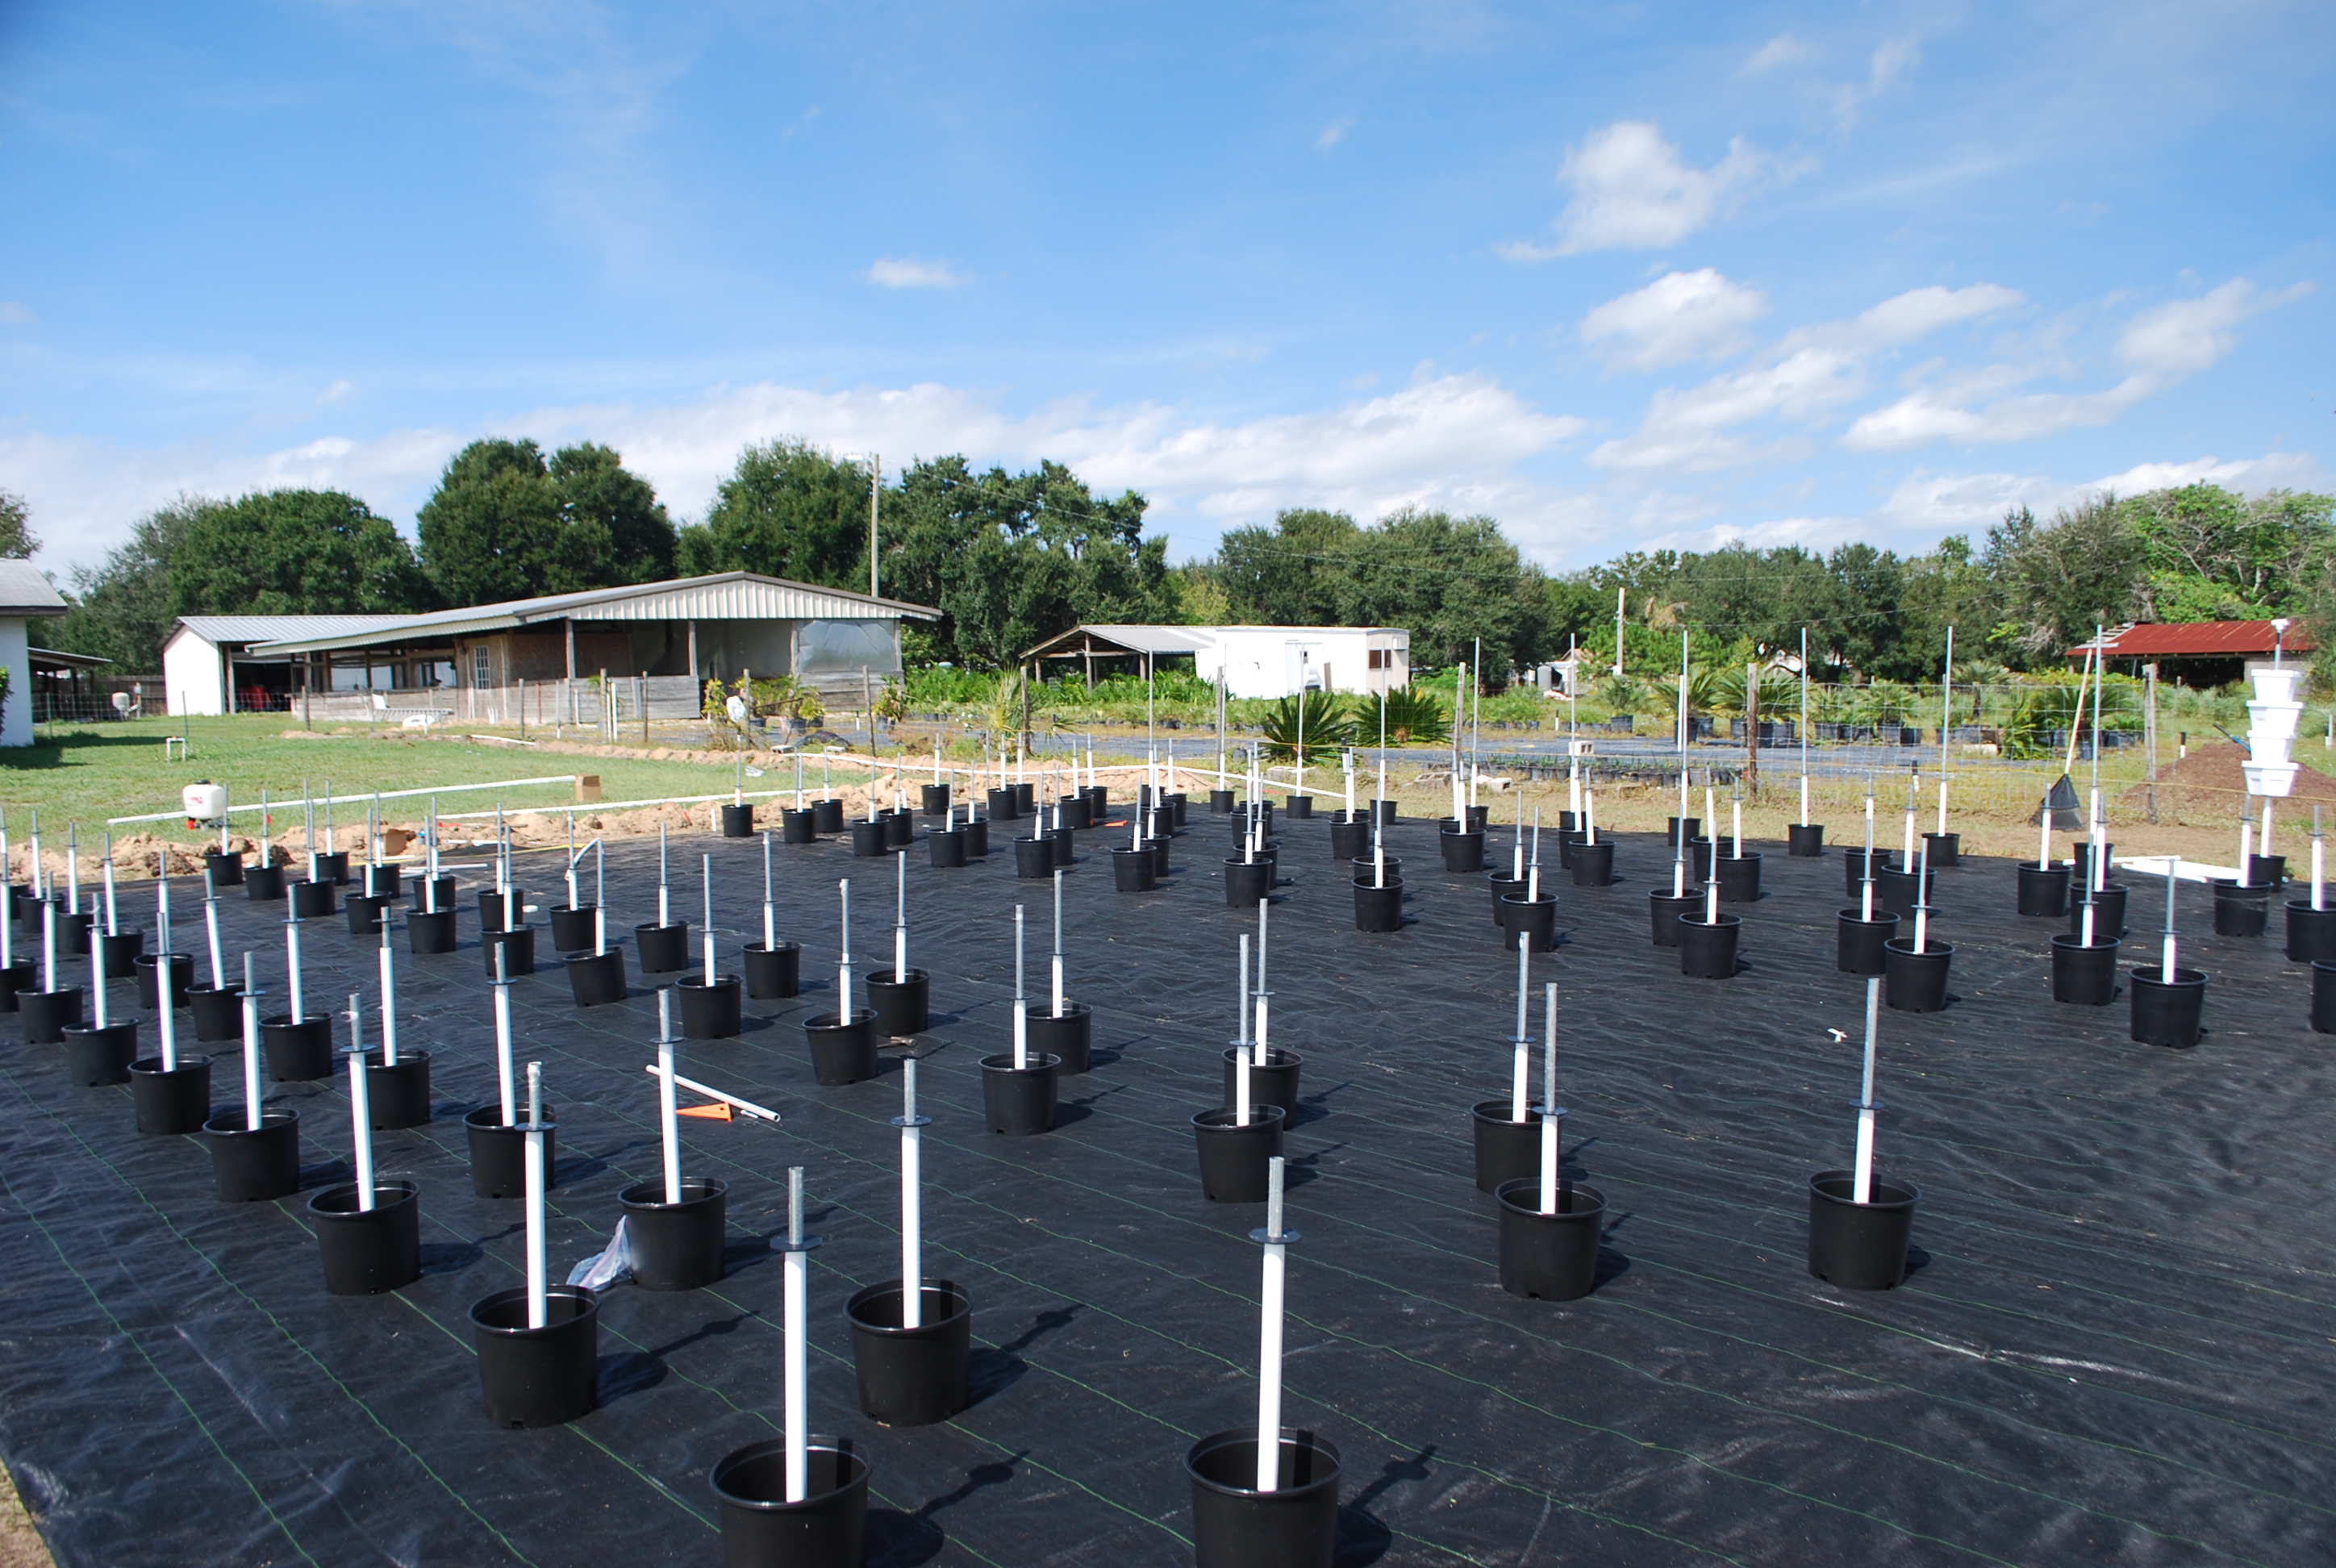
After the initial internal support pipes are set up. Begin laying out the rest of the internal support pipes. These will be spaced 42 inches apart and will follow the lines on the ground cover to ensure that they are in a straight line. It is extremely important during this step that all of these are leveled because if they are not then your towers will be crooked and not stand straight.
بعد تعيين الأنابيب الدعم الداخلي أولية تصل. تبدأ بطرح بقية الأنابيب الدعم الداخلي. سيتم متباعدة 42 بوصة وبصرف النظر هذه وسوف تتبع خطوط على غطاء الأرض لضمان أن تكون في خط مستقيم. من المهم جدا خلال هذه الخطوة أن كل هذه وجهت لأنه إذا أنها ليست عندها ملتوية أبراج الخاص بك، وليس الوقوف مباشرة.

After your internal support pipes are driven into the ground you will install the outside support pipe. The outside support pipe is in two pieces. You install the first by placing over the internal support pipe then drive into the ground as well. Make sure that use use the driver tool to avoid damaging the pipe because if you damage the pipe the swaged end will not fit into the support pipe.
بعد هي التي تحرك الأنابيب الدعم الداخلي الخاص بك إلى الأرض سيتم تثبيت الأنابيب الدعم الخارجي. الأنابيب الدعم الخارجي هو في قطعتين. تثبيت أولا عن طريق وضع أنبوب على الدعم الداخلي ثم دفع في الأرض كذلك. تأكد من أن استخدام استخدام أداة سائق لتجنب إتلاف الأنابيب لأنه إذا تلف الأنابيب سوف نهاية مطرق لا يصلح في الأنابيب الدعم.
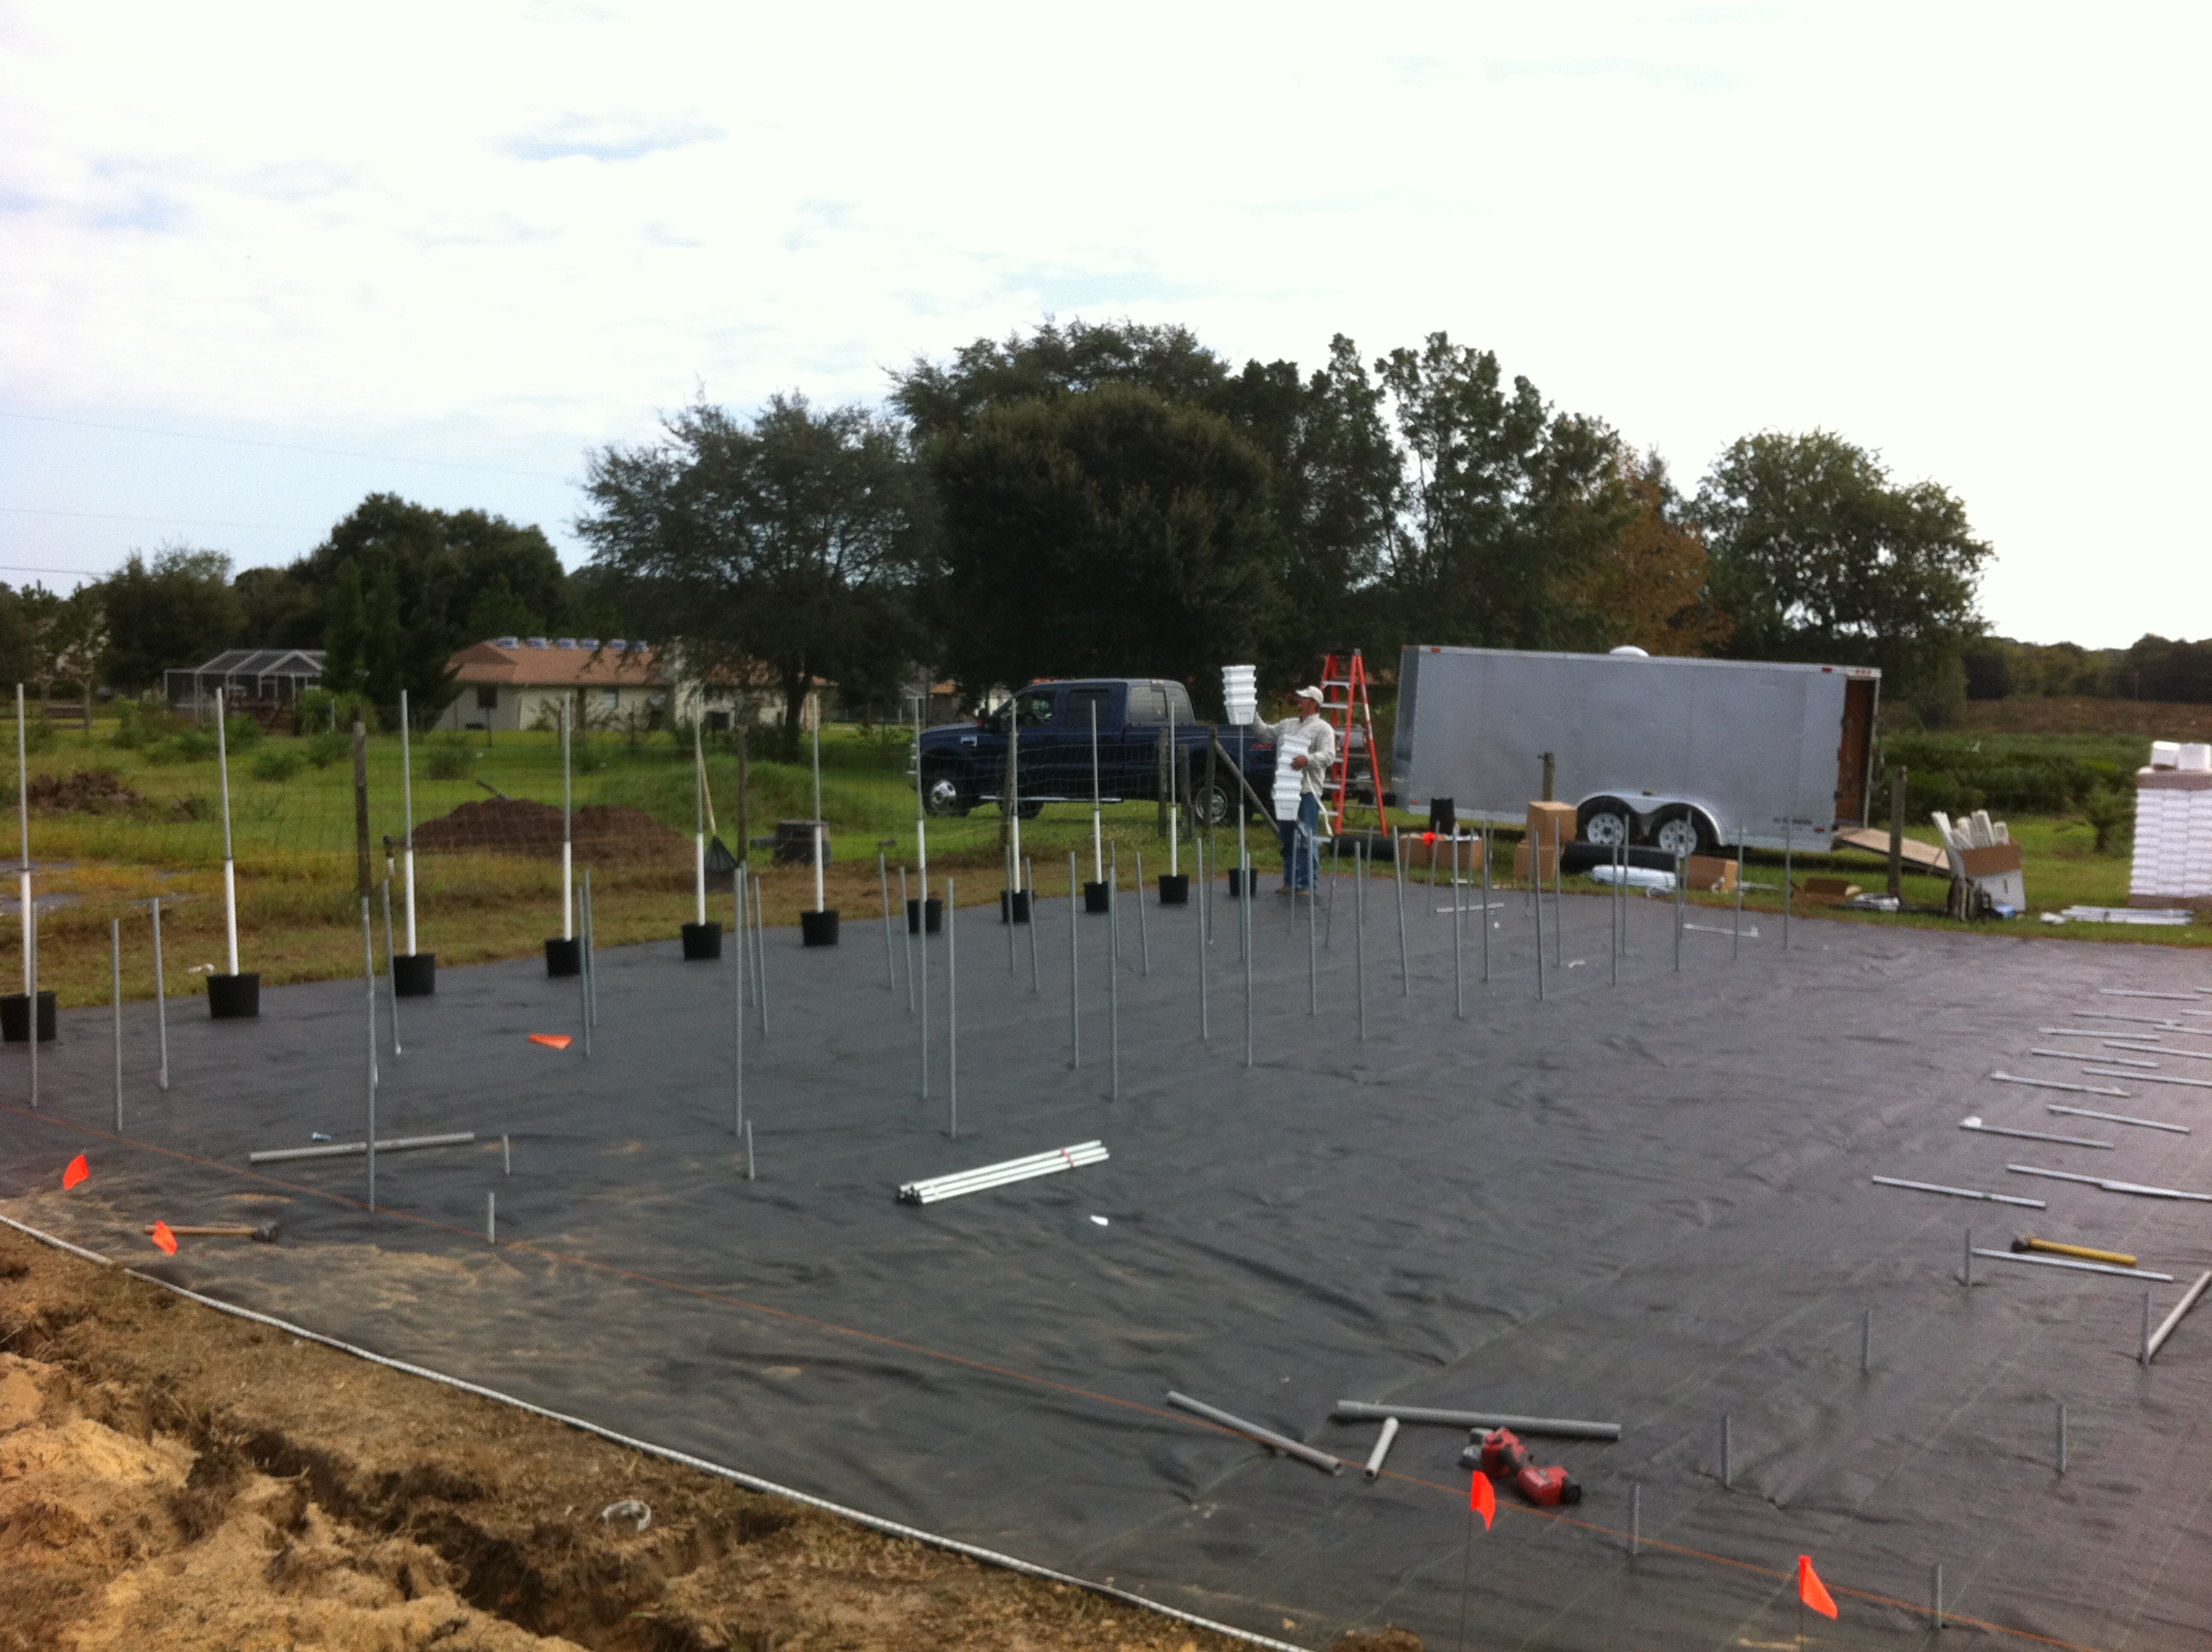
 Continue laying out the internal support pipes. Begin putting ground pots on the outside tower support pipes. After the ground pot is installed, install the swaged end of the outside support pipe.
مواصلة وضع خارج الأنابيب الدعم الداخلي. تبدأ بوضع الأواني على الأرض خارج الأنابيب دعم البرج. بعد تثبيت وعاء الأرض، تثبيت مطرق نهاية الأنبوب الدعم الخارجي.
Install the riser pipe and the flat plastic piece to hold the towers up. After these two pieces are installed you can begin putting the vertigro pots onto the towers.
تثبيت أنبوب الناهض وقطعة البلاستيك شقة لعقد أبراج يصل. بعد أن يتم تثبيت هذه قطعتين يمكنك البدء في وضع الأواني vertigro على الأبراج.
 Picture of all the ground pots with risers installed. Ready for swaged end support pipe to be installed and pots to be installed.
صورة لجميع الأواني الأرض مع تثبيت الروافع. على استعداد لدعم نهاية مطرق الأنابيب ليتم تثبيتها والأواني ليتم تثبيتها.

 Vertigro pots installed!
الأواني Vertigro مثبتة!

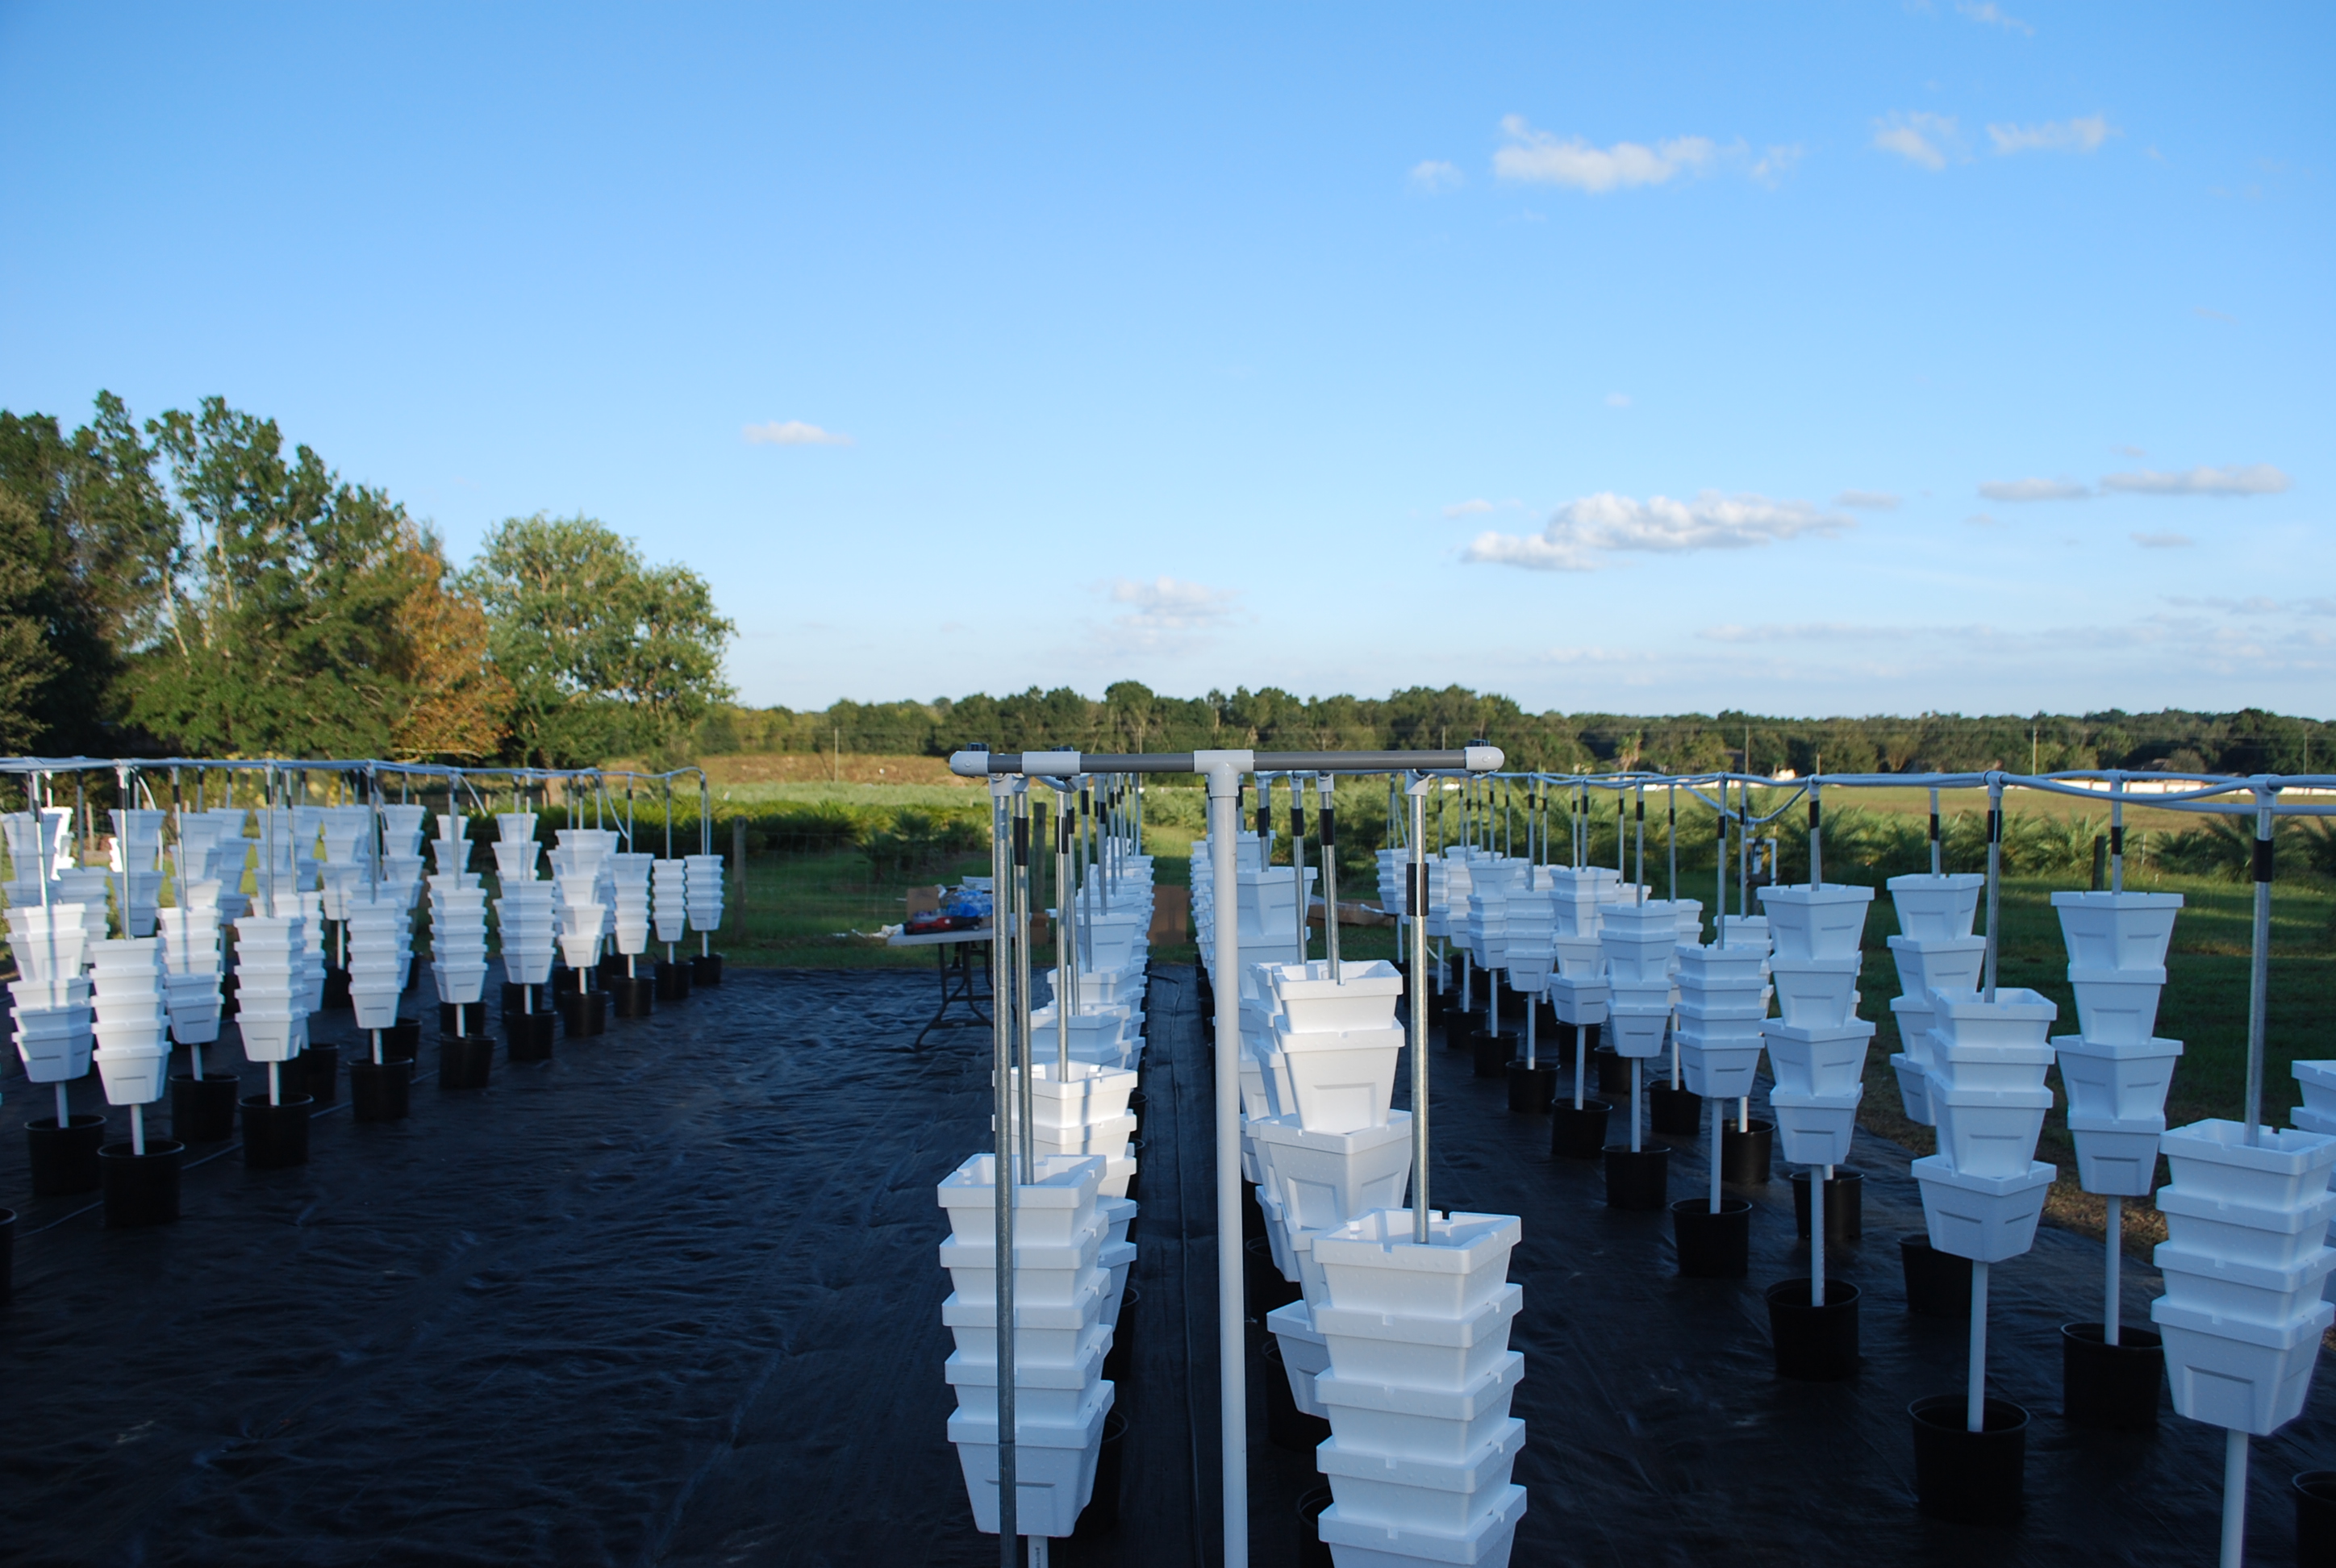
Install the T’s onto the tops of the towers. After this run the pipe through the T’s. Leave some extra at the ends.
تثبيت تي على قمم الأبراج. بعد تشغيل هذا الأنبوب من خلال تي. ترك بعض اضافية في نهايات.
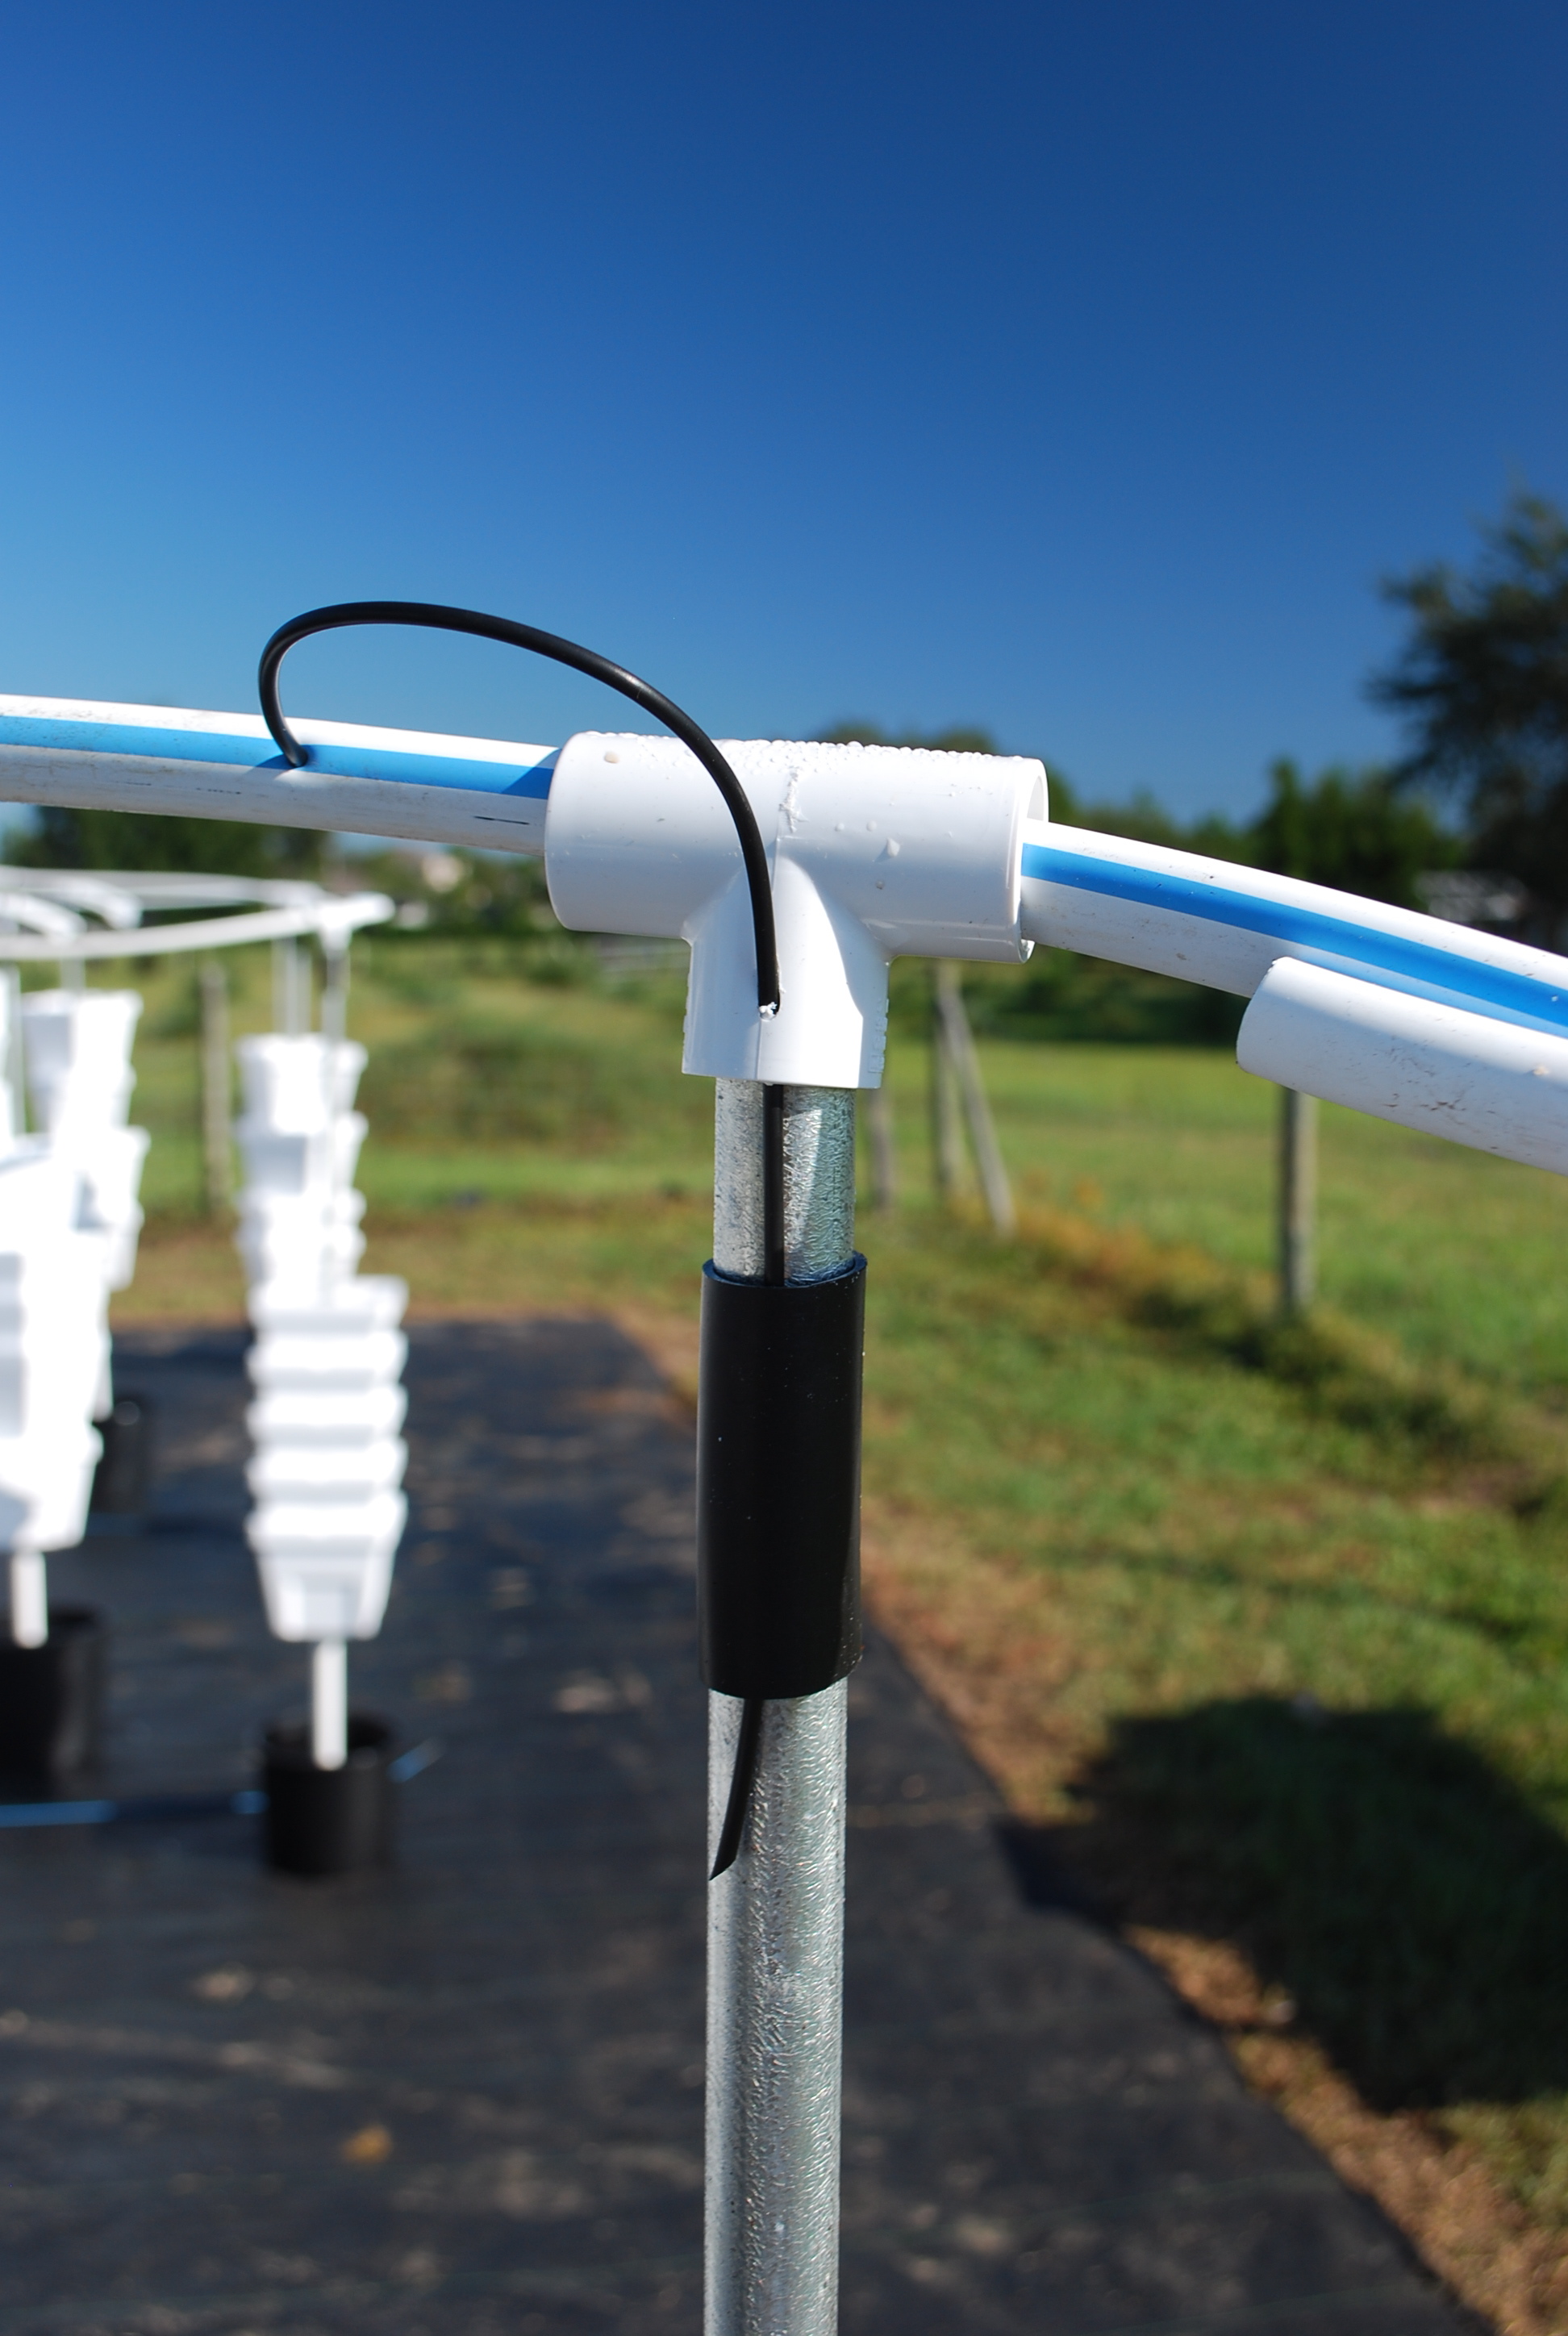
Connect the pipes running through the T’s to the pipe that comes from the injector board.
ربط أنابيب يمر عبر تي أن الأنبوب الذي يأتي من مجلس حاقن.

All of the pipes connected to the nutrient supply lines.
كل من أنابيب متصلة خطوط إمداد المواد الغذائية.
Install the distribution line to the nutrient supply line.
تثبيت خط توزيعها على خط إمداد المغذيات.

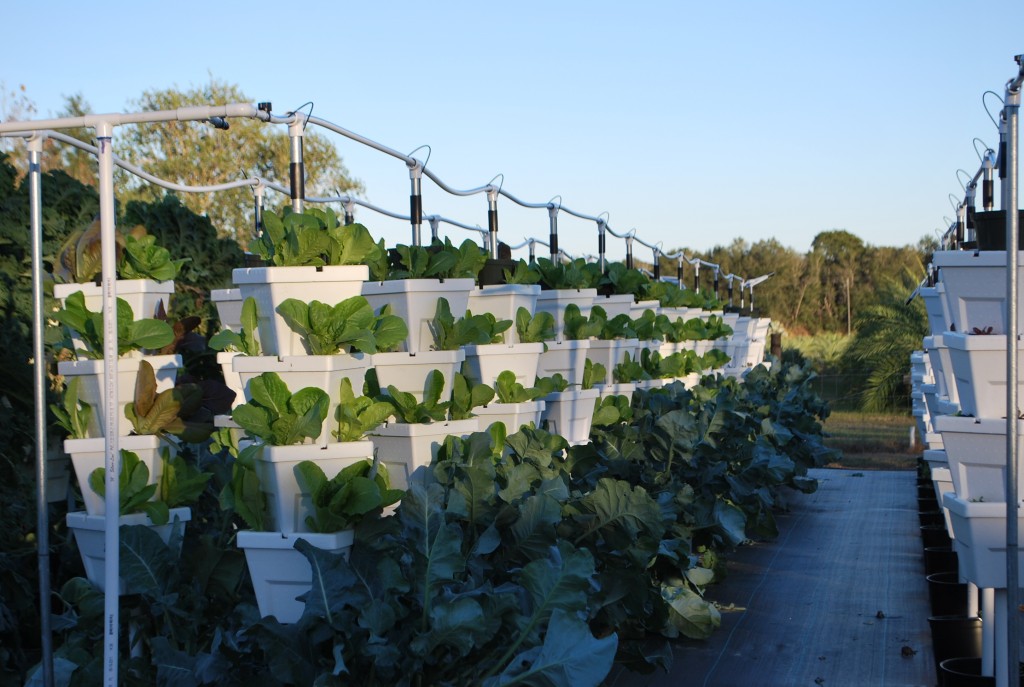
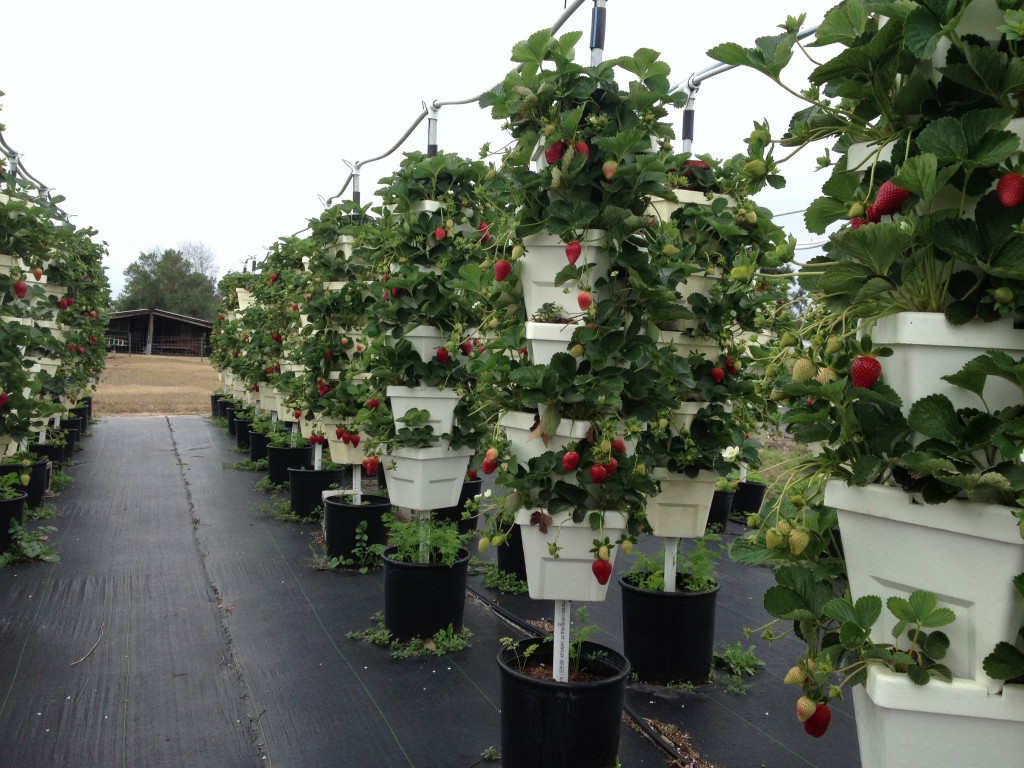
Picture of the towers filled with media and strawberry plants installed. Misting overhead to keep the plants cool. Absolutely beautiful!
Hope you enjoyed the install of our system. If you would like to learn more about the operation of the farm, how to identify bugs, etc. Please sign up for our farm education package!
صورة للأبراج مليئة الإعلام ونباتات الفراولة المثبتة. التغشية النفقات العامة للحفاظ على النباتات بارد. جميل على الاطلاق!
نأمل لكم تتمتع تثبيت نظامنا. إذا كنت ترغب في معرفة المزيد عن هذه العملية من المزرعة، وكيفية تحديد الخلل، وما إلى ذلك يرجى الاشتراك في مجموعة التعليم مزرعتنا!
ليست هناك تعليقات:
إرسال تعليق